Making the TFF Aerial

A forum to show any of your restored or built traditional fishing reels.
Post Reply
User avatar
Watermole+
Chub
Posts: 1057
Joined: Thu Mar 15, 2012 11:07 pm
12
Location: Devon & Cornwall border

Re: Making the TFF Aerial

Post by Watermole+ »

Part 7. Making the Hub and Spindle

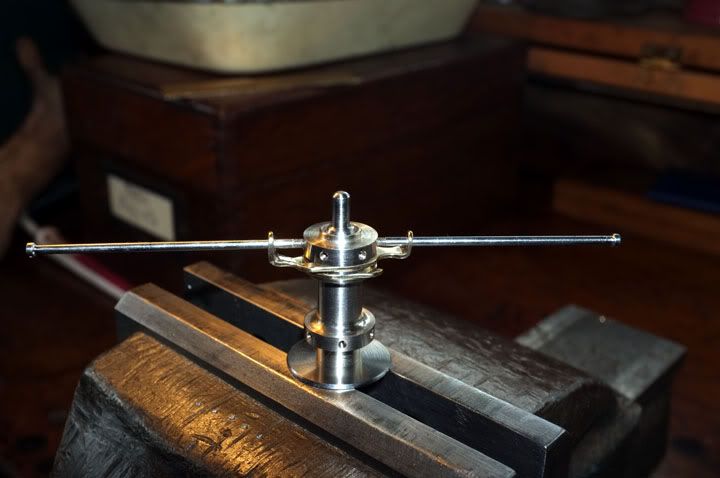
These are the most important parts of any Aerial-type reel. As any reel-maker will confirm, the spindle must be turned absolutely true and to size. The hub which runs on it must have a precision size & parallel bore, with the spoke holes correctly positioned both radially and longitudinally. Also, the grooves for the forks have to be in the right places, with particular regard to the very small slots at the bottom of the grooves, as the rearmost one positions the line drum on the spindle. It's not really as difficult as it sounds but with a very small margin for error on any of the dimensions, it's not the sort of job you can rush..if you want to get it right and not just 'near enough', which is not acceptable.
I've been working on this about one hour each evening this week and have managed to make good progress on these two components. There are still some tasks to complete but this is what we've done so far..

..Starting with the hub then; the first thing was to put a billet of material in the chuck and rough it down to size, plus a little for finishing. This piece of nickel-ali. bronze is of the highest quality and can run with only minimal lubrication, which is ideal. Most of these pictures are very similar to the Coxon Aerial project so I hope you don't mind.

Image

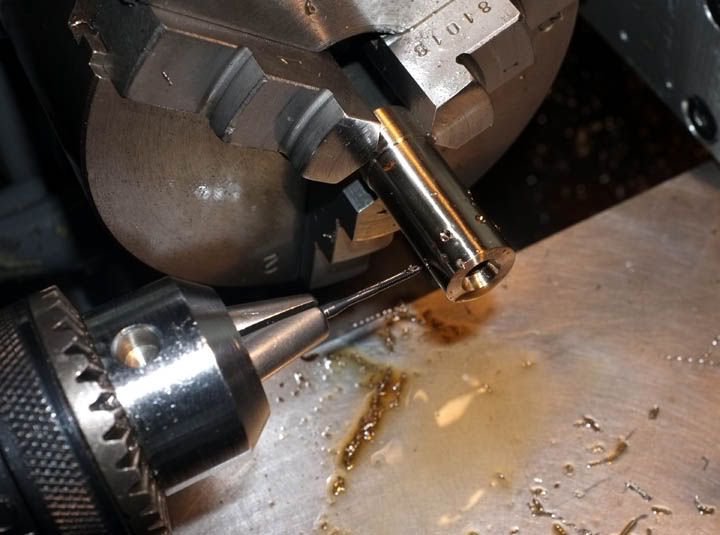
The next thing was to drill the hole for the spindle. This is 0.010" undersize to allow for finish-boring. It has to be bored because no drill can be expected to cut both dead to size, dead concentric and with good finish.
After that was done, the drilling attachment was set up and the six holes for the rearmost spokes were spot-drilled, 60 degrees apart. This is to ensure that the drill itself starts in the right position and does not 'wander'.

Image

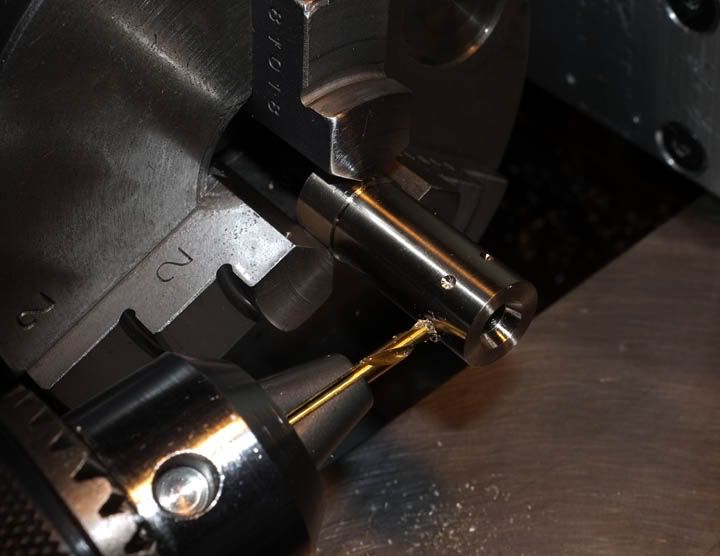
They were then drilled 1.25mm diameter through to the bore...

Image

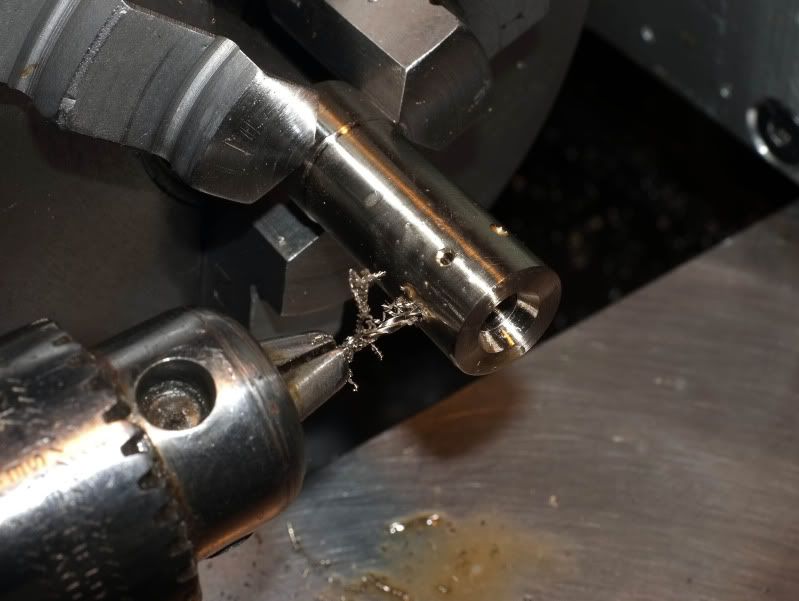
...and tapped with a M1.6 x 0.35 pitch tap. If you are having a go at this, the tap is very small and very brittle, so go easy..!

Image

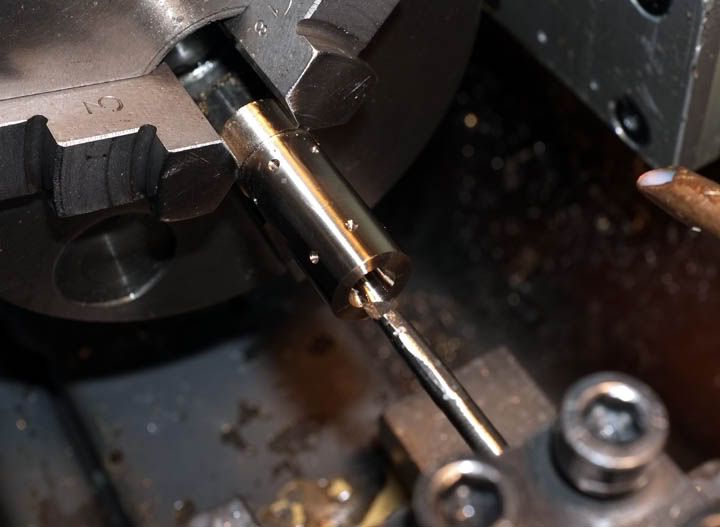
All six were completed without mishap so the attachment was indexed along to the right spacing for the outermost spokes and then indexed radially 30 degrees before drilling & tapping the second set of six in the same fashion.

The next job was to bore out the drilled hole to the spindle size. It was necessary to do several 'spring' cuts to allow the tool to produce a perfectly parallel bore of good surface finish.

Image

This was carefully checked for parallel and size, using a small internal micrometer.

Image

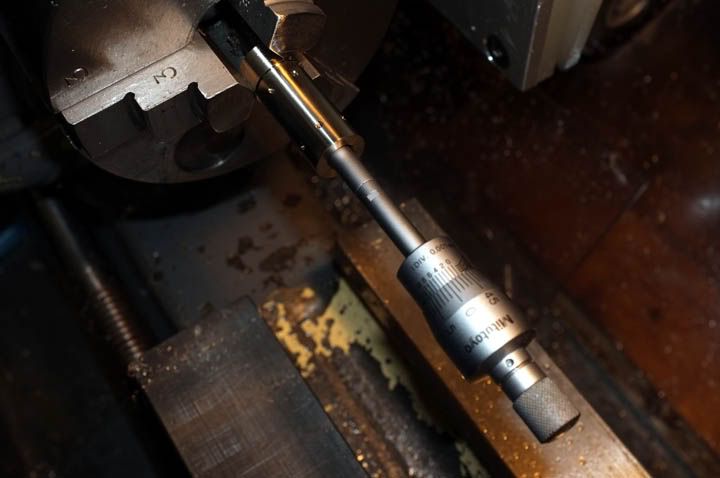
This is a great little instrument-and the only one to really accurately measure a small bore. It is part of a set of three (complete with their own calibration gauges), which can measure up to 12mm diameter (0.47244") and have been worth their weight in gold when making new rod ferrules, where you must work to 0.0001" tolerance.

Image

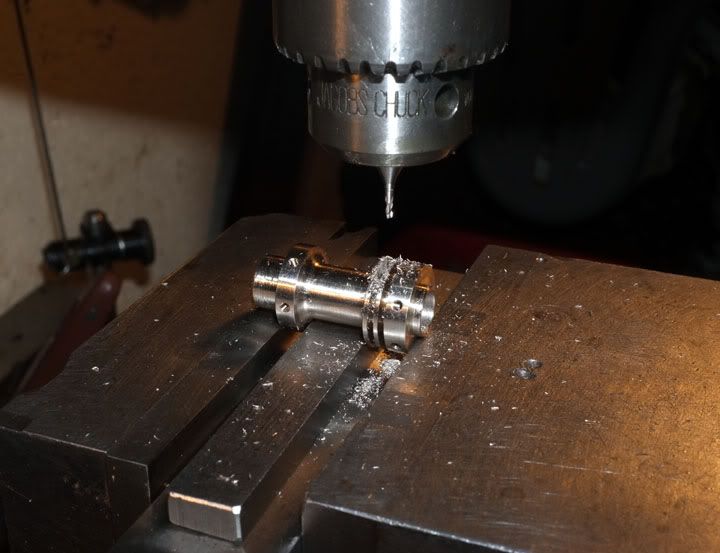
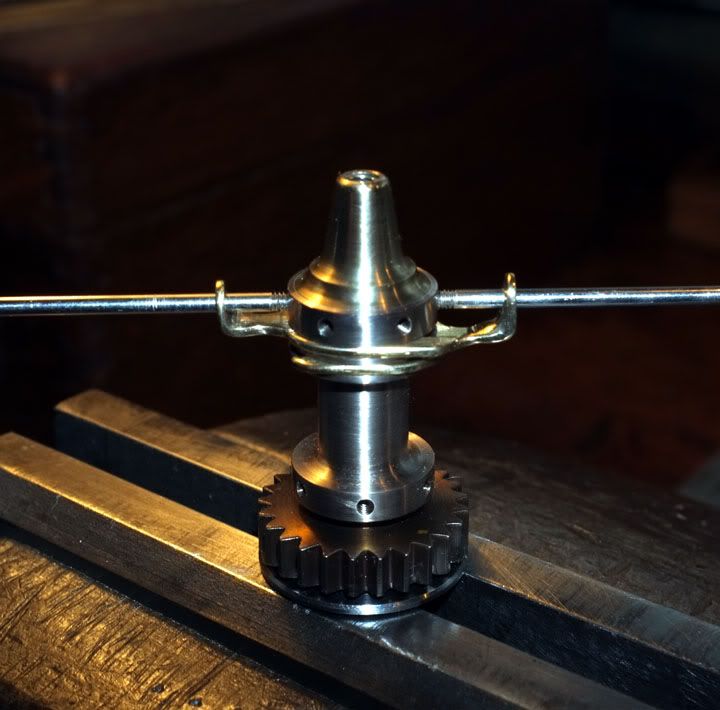
The next thing was to put in the fork grooves..

Image

...and then turn the diameter for the check wheel. When that was done, the centre portion was relieved by turning down to 5/16" diameter.

Image

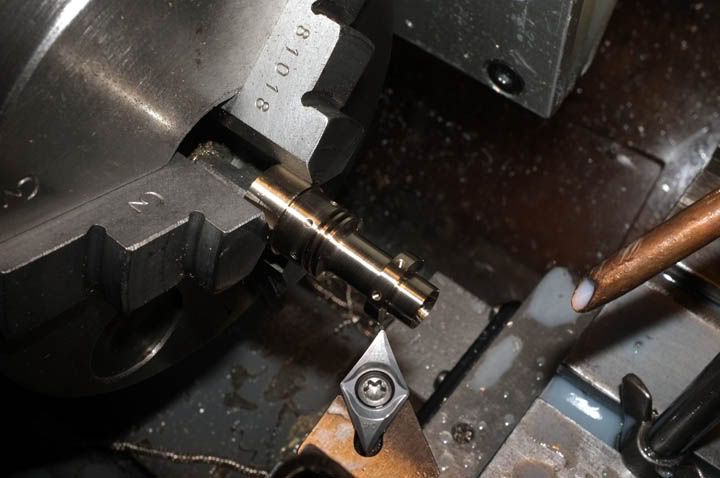
The small step diameter was put in for the end cap and the hub was then 'parted of'.

The Spindle.

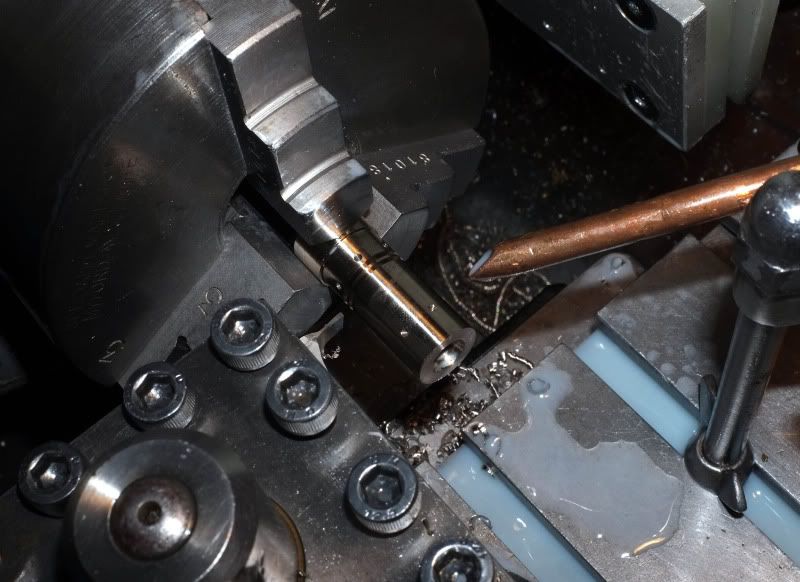
As before, this was made from 17/4 ph stainless steel; a most excellent material for the job and one which will not react chemically or physically with nickel ali. bronze.
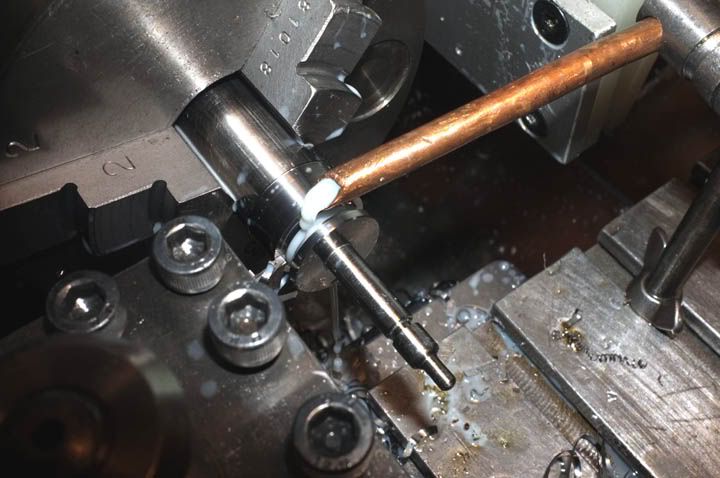
All turning operations were done without removing the work from the chuck, thus guaranteeing concentricity. Here, most of the turning has been done and we are producing the backplate location diameter. This is vital, as the running clearance between line drum and backplate will be only 0.002" to avoid line-trapping.

Image

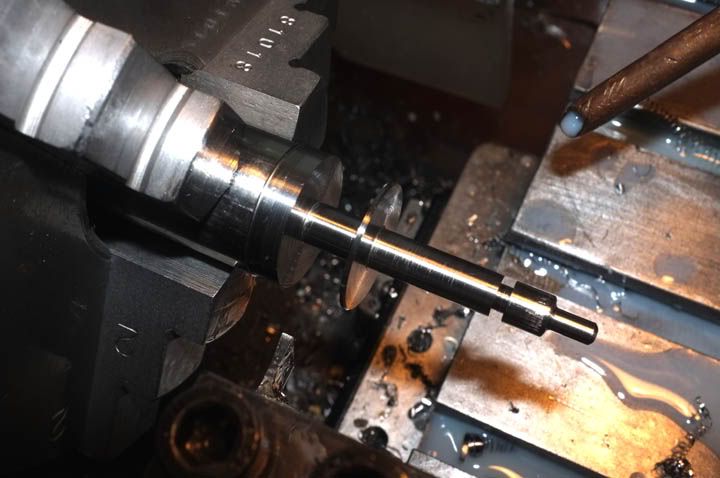
Finishing the location diameter. The front taper has yet to be done and it is then all polished to size..

Image

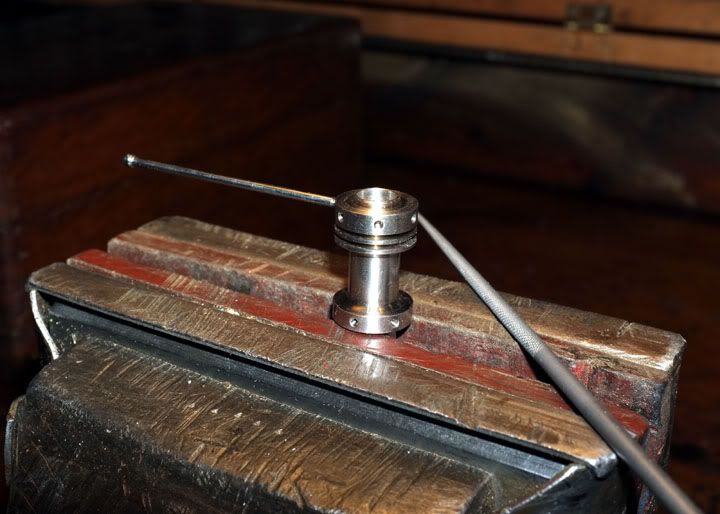
Checking the hub for fit..

Image

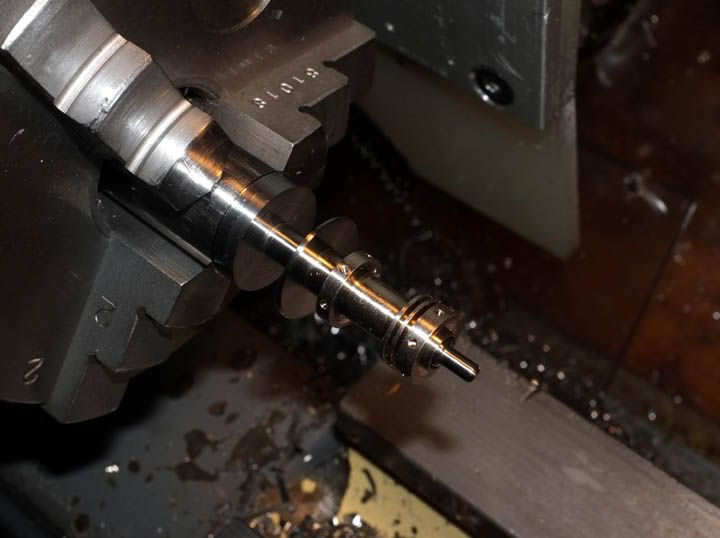
That completes most of the work on this part. Next time, we are going to make the star back and reel seat. Looking at it now, although it looks OK on that type of reel, it was rather unnecessarily OTT on metal thickness, so this time it's going to be a bit more in keeping with what is required..

Regards for now,

wm+

"Are not two sparrows sold for a farthing? Yet one of them shall not fall without your Father knoweth" ..Jesus of Nazareth, King James AV

User avatar
Loop Erimder
Wild Carp
Posts: 9984
Joined: Wed Apr 04, 2012 11:33 pm
12
Location: Leicestershire

Re: Making the TFF Aerial

Post by Loop Erimder »

Great stuff again WM+
Chance is always powerful. Let your hook be always cast; in the pool where you least expect it, there will be a fish

User avatar
Mark
Head Bailiff
Posts: 21193
Joined: Mon Aug 22, 2011 4:55 pm
12
Location: Leicestershire
Contact:

Re: Making the TFF Aerial

Post by Mark »

:hat: :hat: :hat:
Mark (Administrator)

The most precious places in the English landscape are those secretive corners,
where you find only elder trees, nettles and dreams. (BB - Denys Watkins-Pitchford).

User avatar
Nobby
Wild Carp
Posts: 10987
Joined: Sun Oct 02, 2011 2:40 pm
12
Location: S.W.Surrey
Contact:

Re: Making the TFF Aerial

Post by Nobby »

Ooooohhhhhh!


I don't want to wait another week!

:twisted:
:twisted:
:twisted:
:twisted:

User avatar
Beresford
Sea Trout
Posts: 4261
Joined: Sat Dec 17, 2011 1:26 pm
12

Re: Making the TFF Aerial

Post by Beresford »

Brilliant as ever.
The Split Cane Splinter Group

User avatar
TemeLAD
Crucian Carp
Posts: 970
Joined: Thu Jun 07, 2012 8:16 pm
11

Re: Making the TFF Aerial

Post by TemeLAD »

A gem of a thread - superb!
"I can't wait to buy a bamboo pole and a filament of line and a tube of breadcrumbs. I want to participate in this practice which allows a man to be alone with himself in dignity and peace. It seems a very precious thing to me".

John Steinbeck

User avatar
Watermole+
Chub
Posts: 1057
Joined: Thu Mar 15, 2012 11:07 pm
12
Location: Devon & Cornwall border

Re: Making the TFF Aerial

Post by Watermole+ »

Part 8. Finishing the Hub and Spindle

Slight change of plan. This was to have been making the star back but events during the part few days have decreed otherwise.. However, a start has been made and I promise that it will definitely be completed for next week.

Last time, we were making the Hub and Spindle, nether of which were fully finished so I thought that this ought to be taken care of and you can see some of the detail which has to be done..-and, I've been making a note of how long it takes to do!

To finish the spindle, it was reversed in the lathe, faced off to length and then drilled & tapped with a 4BA thread. This is to accept the securing screw which goes through the star back. I haven't bothered taking a picture of this as I'm sure by now you must be getting a teensy bit fed up with seeing boring and pointlessly repetitive photos of a lathe chuck with a piece of metal stuck in it!

With that done, it was time to complete the Hub.
We now have to put in the little slots, one at the bottom of each groove, dead centred on one pair of the spoke holes, and 180 degrees apart. You will see that, in the middle of each fork, there is a little tongue with a radiused bottom. This tongue locates within each slot, the rearmost one locking the line drum on the reel and the front one is the friction check for the drum.
To do this, I firstly positioned the hub very accurately in the vice, using a spoke as a vertical guide, then used a 1mm diameter slot drill and very carefully and delicately, cut the slots with an electric drill in a drill stand. Such small cutters are very brittle and can snap with very little provocation, particularly on bronze, so the greatest care was needed to do this. I spent over two hours on this little job alone. To give you an idea of perspective, the biggest diameter on the bronze hub is exactly 1/2", that is 0.500".

Image

To measure the width of the slot, (it is too fine to get the points of a vernier calliper across them) I made a simple tapered gauge which could assess the width.
The slots were then finished by hand with the finest of fine needle files.

Image


The next thing was to make the little forks which go in the slots. I don't mind admitting, I was not looking forward to this job, as it requires a very steady hand with the needle- and Warding files, as well as a good eye, both of which are not in the same league as they once were.

Well, in the end we got there, but it took 10 hours to do it!!
The material used was drawn & rolled, sheet ali. bronze. This is very hard-wearing and ideal for the job. It is however, very important to make sure the grain goes in the right direction!
I started by hacksawing a strip and filing this to exactly 1/2" wide. The next step was to position it square in the vice and file out the centre gap to precisely the root diameter of the grooves in the hub, i.e. 5/16" (0.312"), plus minimum clearance.

Image

This gap was then extended at each side with a half-round, needle file to produce the little tongue. Then the outside was radius filed to blend and produce the 'leg'. When complete, the leg was bent to 90 degs. and the 1.6mm hole put in to take the spoke. It was finally finish-filed dressed off with 400 grit emery and polished.
Two forks are needed but care must be taken when putting the hole in as they are in different positions, also, the tongues are of different length, radius and width.

This is what you get after 10+ hours work.

Image

Now we need to make trial assembly, to make sure that there are no 'tight' spots which may require polishing out..

Image

Using two spokes left over from the last project, all seems to go together without any problem. The final step is to make the end cap for the spindle. I have not shown this being turned as I'm sure by now you know what happens, but suffice to say that, it was turned, drilled and tapped to take the end-float adjusting screw, then bored with a tiny tool, to accept the 0.125" end diameter of the spindle.
It was then soldered on and cleaned up. The spindle was 'run in' within the hub until all the 'high' spots were gone and here you see it complete with check wheel (which I have hardened and tempered), being tested for free-running..
What you are looking at here alone represents about 25 hours of careful work.

Image

More next time..

wm+

"Are not two sparrows sold for a farthing? Yet one of them shall not fall without your Father knoweth" ..Jesus of Nazareth, King James AV

User avatar
Loop Erimder
Wild Carp
Posts: 9984
Joined: Wed Apr 04, 2012 11:33 pm
12
Location: Leicestershire

Re: Making the TFF Aerial

Post by Loop Erimder »

flippin eck you have some amazing patience sir , totally fascinating :hat:
Chance is always powerful. Let your hook be always cast; in the pool where you least expect it, there will be a fish

User avatar
Mark
Head Bailiff
Posts: 21193
Joined: Mon Aug 22, 2011 4:55 pm
12
Location: Leicestershire
Contact:

Re: Making the TFF Aerial

Post by Mark »

Very nice wm+. :thumb:
Mark (Administrator)

The most precious places in the English landscape are those secretive corners,
where you find only elder trees, nettles and dreams. (BB - Denys Watkins-Pitchford).

User avatar
Nobby
Wild Carp
Posts: 10987
Joined: Sun Oct 02, 2011 2:40 pm
12
Location: S.W.Surrey
Contact:

Re: Making the TFF Aerial

Post by Nobby »

Exquisite in its own right!

Post Reply

Return to “Traditional Reel Building and Restoring”