Making the TFF Aerial

A forum to show any of your restored or built traditional fishing reels.
Post Reply
User avatar
Watermole+
Chub
Posts: 1058
Joined: Thu Mar 15, 2012 11:07 pm
12
Location: Devon & Cornwall border

Re: Making the TFF Aerial

Post by Watermole+ »

Part 10. Making the tension adjuster... ..but it's slooow going..

Do you ever get to a stage with something and then wonder, why am I doing this?

Well, it's been very much like that this week. Spare time has been at a bit of a premium and trying to concentrate on something for the odd half-hour, late in the evening after a long day, is not the best time to try and be creative.
The TFF reel has now got to the stage where a definite decision has to be made about the type of pawl/check spring to have, how to make it adjustable and where best to site it. One of the best-and simplest-ideas is that on the W.R. Speedia reels; a 3-position thumbwheel giving different spring tension on the check pawl.-Just brilliant! The problem with the TFF is entirely of my own making so can't blame anyone else; I wanted a wooden back and by trying to be clever and minimising inside clearance between the drum inner and the backplate, I've managed to box myself into a corner. The line drum is already made so can't, or don't particularly want to alter that-and so just don't have the space to incorporate a Speedia-type wheel. In a way I'm not sorry because this is supposed to be an original sort of design and I don't want to directly copy an existing reel.
Anyway, after much time-wasting and playing around, I decided that the check adjuster will be set centrally on the rim, just in front of the reel seat and be based on the Hardy fly reel type; viz. A thumbwheel operated internal screw. I know it sounds a bit too unnecessarily complicated, but at a pinch, it will be possible to squeeze it in-and, it will look rather neat externally.

The first thing was to determine the pawl and spring layout. None of these parts are finished yet; in fact, some have since been scrapped, as you will see..
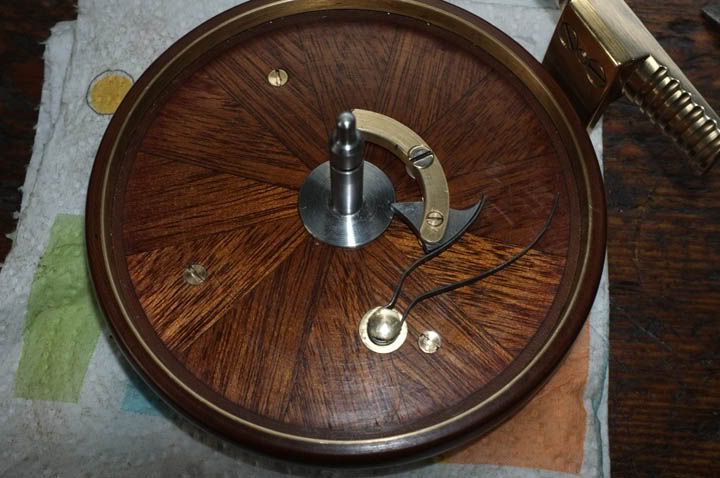
Image

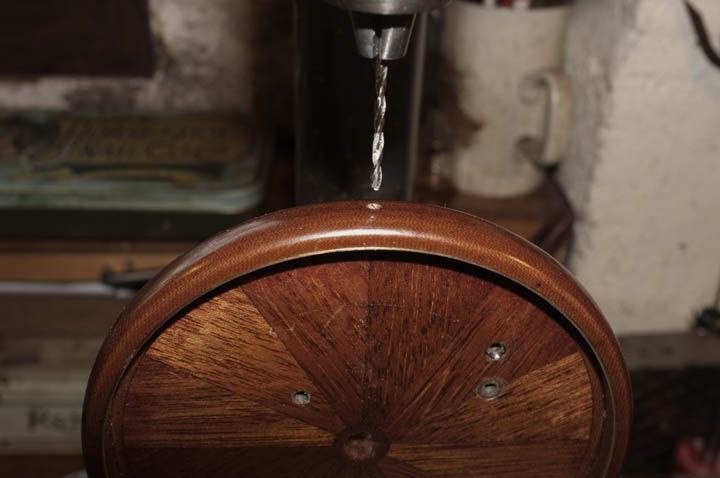
Now we come to the point of no return and drill through the rim. Fortune favours the Brave, so they say, so here we go...
Image

..And straightaway we hit a snag! Having drilled the pilot hole, I found that the bench drill chuck it too small for the long cutter. Nothing for it but to set it up in the lathe and do it that way. I used the 4-jaw for this, holding it very carefully and keeping the speed right down, put the long cutter through. This is to create the groove for the adjuster screw.
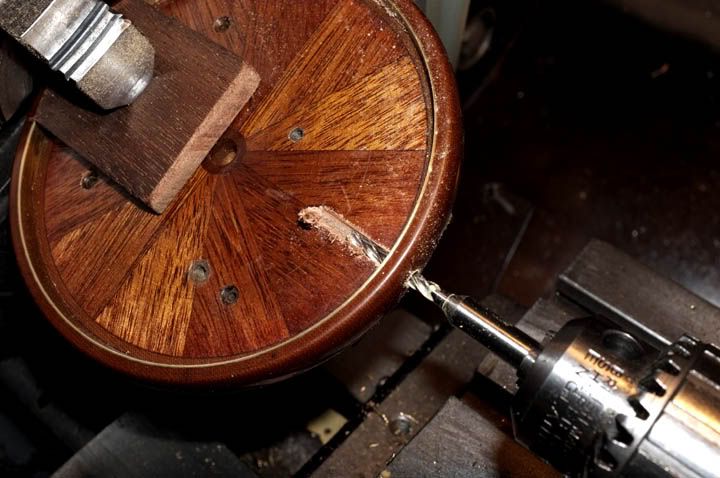
Image

Because of the low speed, it tended to tear the wood a little bit, so will have to sand that out later. Now we have to bore out the hole true and counterbore a recess to accept the tiny bronze bush for the thumbwheel.
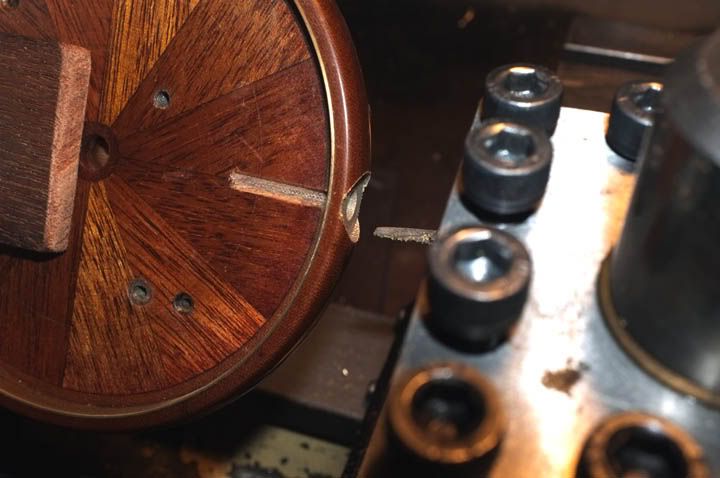
Image

Next, it was back on the bench drill to 'mill' out the little cross-groove for the screw head. (All will become clear soon)
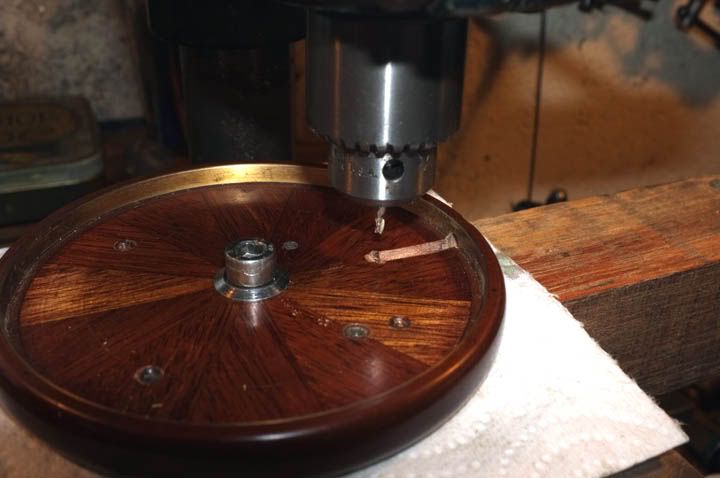
Image

To make the thumbwheel, I turned a piece of harden-able stainless steel and cut the grooves by broaching.
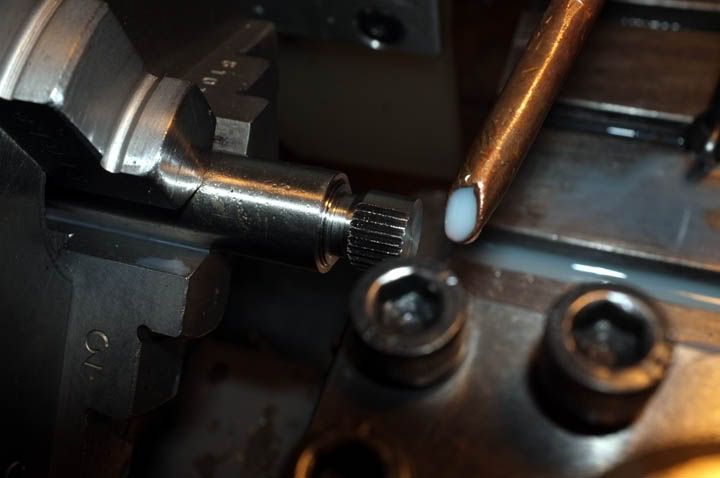
Image

Now, the groove has to be lined to take the little spring holding block which will move up-and down (bear with me on this). I fashioned this from some thin, sheet brass, bending it around a drill shank of the right size and then flattening the sides. You can see the rough shape in this picture. I haven't cut it to length yet.
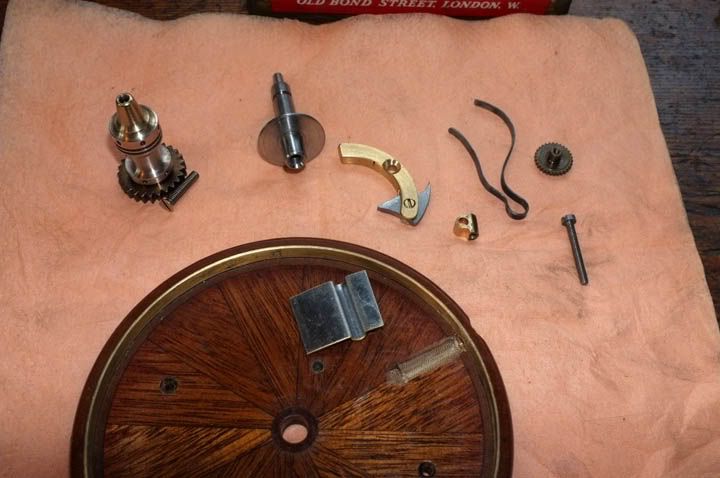
Image

Now it has been cut, the edges filed to thickness and the ends profiled. Here is a trial fitting.
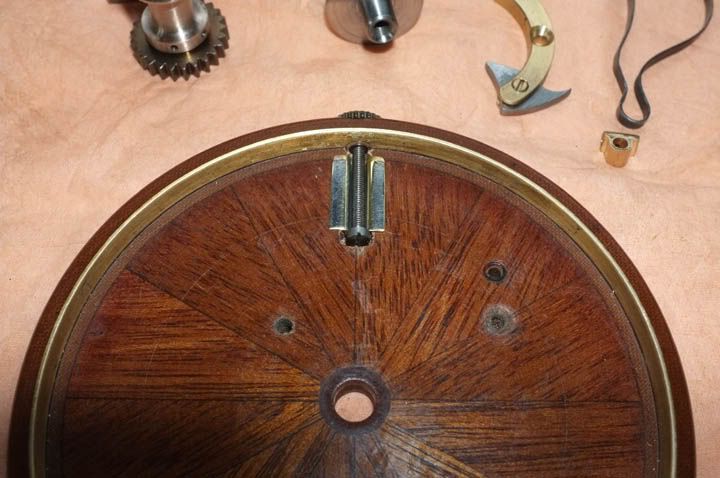
Image

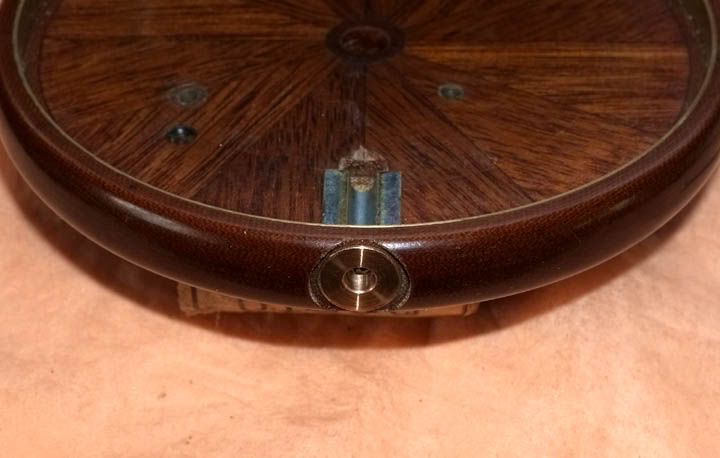
Although not finished, you can see now how it is (hopefully) going to work. This is an end view of the thumbwheel bearing. (It's actually the second one; I made the first one wrong!) It's an interference fit and has been already pressed in permanently.
Image

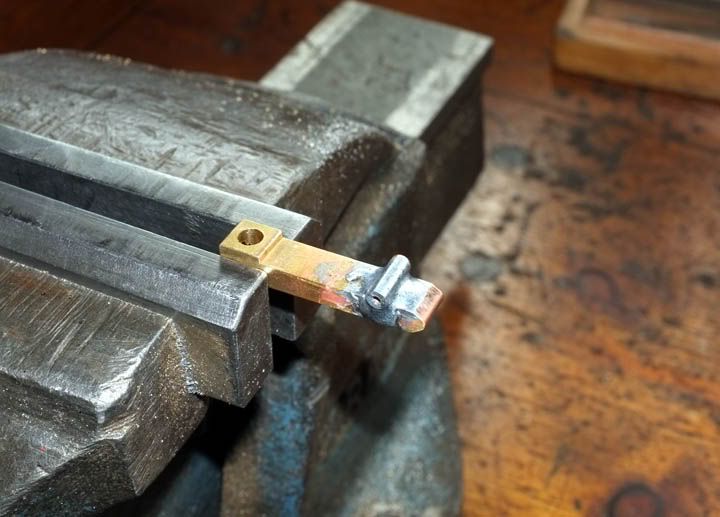
Next, I made the block which holds the spring and travels up-and down, when the thumbwheel is turned. I soldered a piece of tube to a pin from a 13amp. plug.
Image

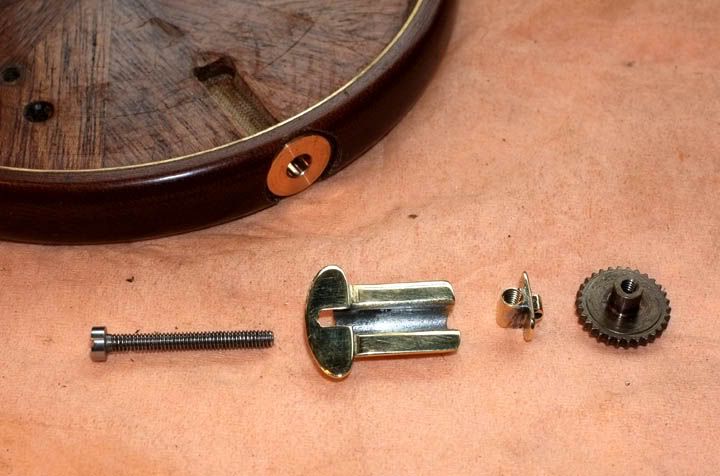
Then hand-filed it to shape, tapped the hole to 8 BA and drilled a 1mm cross hole for the spring wire. I soldered a little piece of brass to the end of the groove lining, to be a 'stop' for the screw-which was made from an 8 BA bolt. The component 3rd from left is what remains of the 13-amp plug pin and tube!
Image

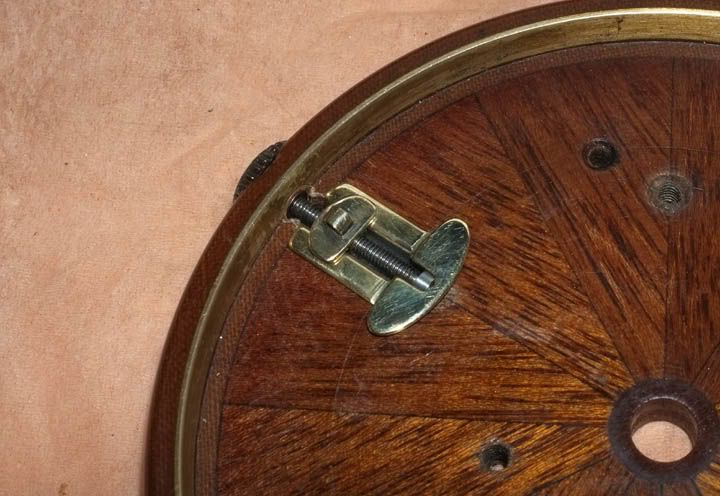
There are some 1.4mm holes to go in yet, which will hold the assembly in place, but here in this trial fitting, you can now see how it works.
Image

Last picture for today shows the bits which are NBG and going in the bin!!
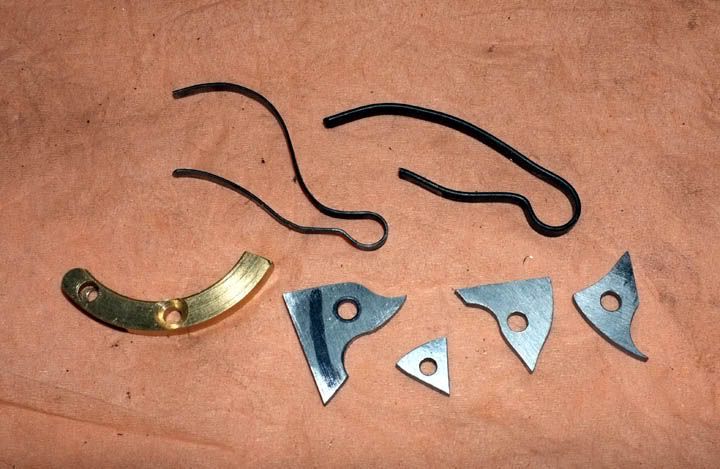
Image

We've nearly got this cracked and can then start on the lever operated check.

More next time.

Regards from wm+

"Are not two sparrows sold for a farthing? Yet one of them shall not fall without your Father knoweth" ..Jesus of Nazareth, King James AV

User avatar
LuckyLuca
Barbel
Posts: 4794
Joined: Mon Jul 02, 2012 10:20 am
11
Location: Oxfordshire

Re: Making the TFF Aerial

Post by LuckyLuca »

Wonderful as always Sir, wish I had your skill and patience!
I walked across an empty land
I knew the pathway like the back of my hand
I felt the earth beneath my feet
Sat by the river and it made me complete.

User avatar
Mark
Head Bailiff
Posts: 21238
Joined: Mon Aug 22, 2011 4:55 pm
12
Location: Leicestershire
Contact:

Re: Making the TFF Aerial

Post by Mark »

Lovely as usual wm+. :thumb:
Mark (Administrator)

The most precious places in the English landscape are those secretive corners,
where you find only elder trees, nettles and dreams. (BB - Denys Watkins-Pitchford).

User avatar
Beresford
Sea Trout
Posts: 4261
Joined: Sat Dec 17, 2011 1:26 pm
12

Re: Making the TFF Aerial

Post by Beresford »

Very creative and wonderful. To my lay-person's eye this doesn't look as if it's been easy work but the end result is beautiful. Of course I've come to expect nothing less!
Last edited by Beresford on Mon Sep 10, 2012 11:06 am, edited 1 time in total.
The Split Cane Splinter Group

User avatar
J.T
Catfish
Posts: 5910
Joined: Mon Sep 05, 2011 1:27 pm
12
Location: Surrey

Re: Making the TFF Aerial

Post by J.T »

Magic! :)
"piscator non solum piscatur"
Image

User avatar
Loop Erimder
Wild Carp
Posts: 9984
Joined: Wed Apr 04, 2012 11:33 pm
12
Location: Leicestershire

Re: Making the TFF Aerial

Post by Loop Erimder »

Great stuff wm+
Chance is always powerful. Let your hook be always cast; in the pool where you least expect it, there will be a fish

User avatar
The Tuesday Swim
Grayling
Posts: 642
Joined: Sat Sep 17, 2011 1:35 pm
12
Location: Clapton on Lea
Contact:

Re: Making the TFF Aerial

Post by The Tuesday Swim »

13 amp plugs will never seem the same again...brilliant!

User avatar
Nobby
Wild Carp
Posts: 10989
Joined: Sun Oct 02, 2011 2:40 pm
12
Location: S.W.Surrey
Contact:

Re: Making the TFF Aerial

Post by Nobby »

Good Grief! ....I held my breath at that shot of the drill bit going into the backplate from the side, I really did.


Might it not just be that by having to take a few short sessions at this, rather than one long stint, that you have looked at it from so many different 'angles' that you have come up with the perfect tension adjuster? It's small, it won't snag line or clothing. It doesn't compromise your original design or demand modifications. It will work.


My only concern is that at tighter setting you may wish the adjuster head both larger and spaced away from the body to ensure a good grip, but the low 'gearing' of the fine thread should help with that I'd guess.

I bet W.R., whoever he was, wishes he'd thought of that!


As usual, a gripping read...this time more so than others, perhaps.


I'm looking forward to the next episode, but staritng to fear the end is nigh as well...this is getting like The Eagle comic or Saturday Morning Pictures!
( Yeah, I really am that old :-( .....)

User avatar
The VFC
Brown Trout
Posts: 1491
Joined: Thu Nov 10, 2011 7:16 pm
12
Location: Norfolk
Contact:

Re: Making the TFF Aerial

Post by The VFC »

Nobby wrote: My only concern is that at tighter setting you may wish the adjuster head both larger and spaced away from the body to ensure a good grip, but the low 'gearing' of the fine thread should help with that I'd guess.

I see what you mean - it may be a case of needing to "suck it and see"? If necessary a slot could be cut into the tension head screw and final tightening done with a coin (like the older reels who's spool screw is designed to take an old 1d piece)?


I'm looking forward to the next episode, but staritng to fear the end is nigh as well...this is getting like The Eagle comic or Saturday Morning Pictures!
( Yeah, I really am that old :-( .....)
Lets hope The Mekon is not taking an interest in this reel from the depths of space and plotting a Treen invasion to come and steal it....

Fabulous work Watermole+ - I can confidently say that there are many of us who will be avidly waiting for the next installment.
Jim

Davyr

Re: Making the TFF Aerial

Post by Davyr »

The VFC wrote: plotting a Treen invasion to come and steal it....
Treen = "Small handmade functional objects made of wood".

Was that intentional, Jim? Brilliant bit of wordplay if it was! :hat:

Post Reply

Return to “Traditional Reel Building and Restoring”