Colorado Classic
Posted: Fri Oct 14, 2022 3:00 am
The Rio Grande King wet fly is a fly that has been around since before 1938. It was first tied by a gentleman who's name was Jim Douglas, who lived in Denver, Colorado. This fly has been through changes throughout the years from it's original Trude style tied in 1906 to
I will be tying both versions, but tonight I will share with you the wet fly version. Many say it's just another version of the Coachman, maybe so, but all I know is this fly has found a page in my fly wallet.
Lets get started.
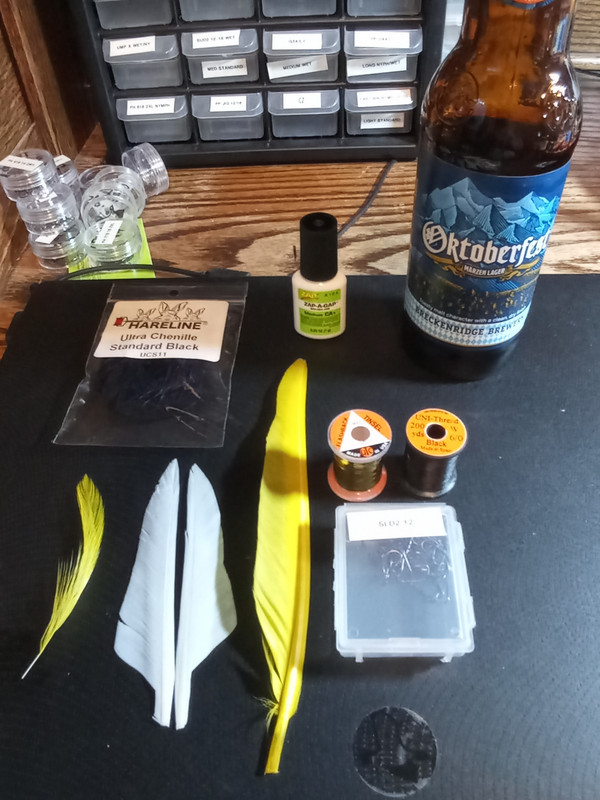
Items needed.
Hook: Partridge SLD2 8 to 14
Thread: Black 6/0 Uni-Thread
Tag: Gold tinsel
Tail: Yellow duck quill
Body: Black Ultra Chenille
Beard: Yellow hen hackle
Wing: White duck or goose quill
Glue: Zap A Gap or any type of superglue
Beverage: Whatever you think you need at the moment.
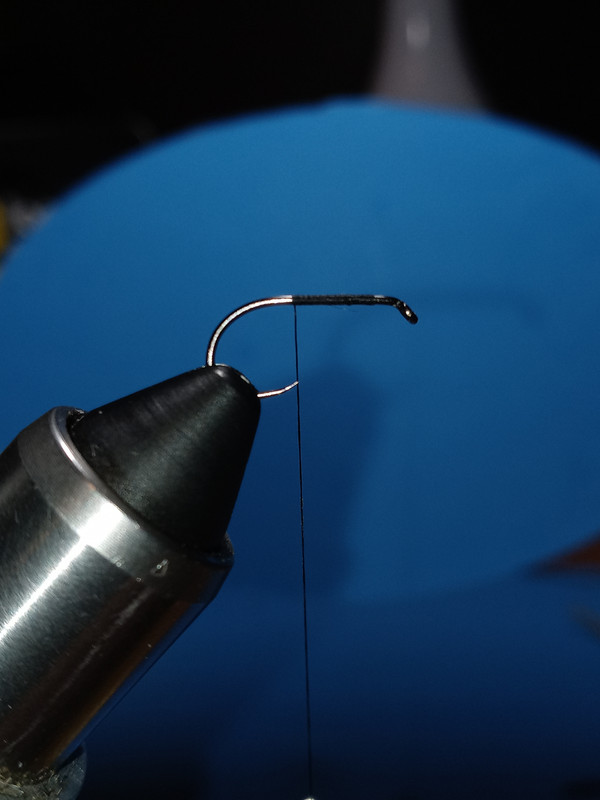
Step 1.
Wax your thread and start behind the eye and wrap it down to the point of the hook.
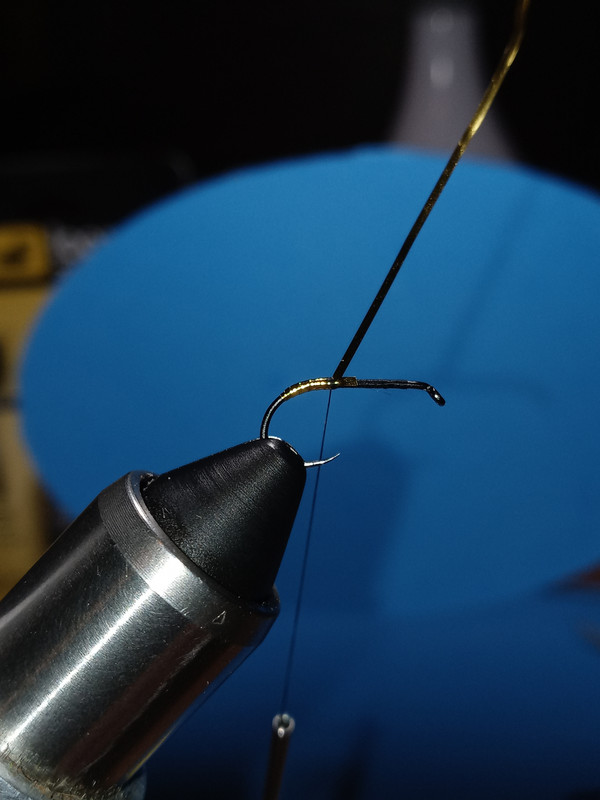
Step 2.
Tie in your tag and wrap it down with the thread just past where the bend of the hook begins. The wrap the thread back up to the point of the hook and wrap the tinsel with touching turns up the bend and start wrapping the extra tinsel on up the shank near the eye and bring the thread back down to the bend of the hook.
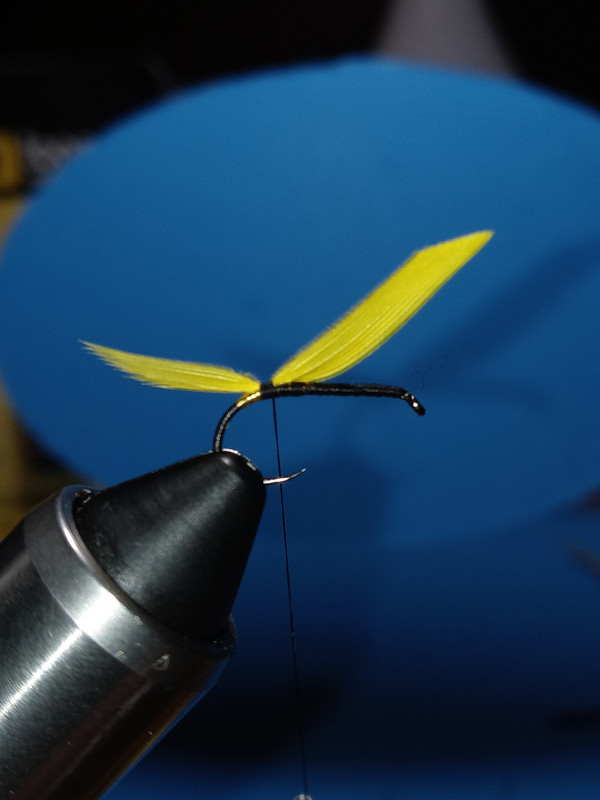
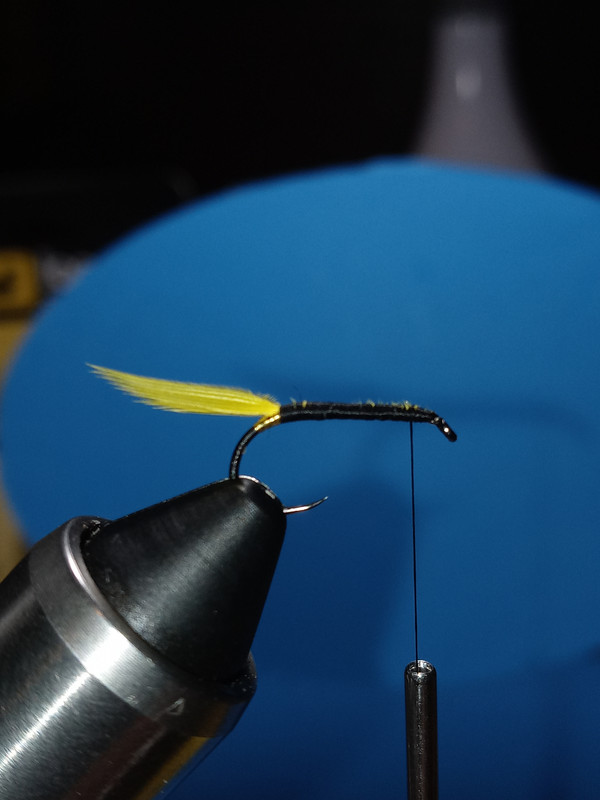
Step 3.
Take a few fibers from the yellow duck quill, five or six will do, and tie in the tail. Make a soft pinch wrap and then allow the bobbin to just hang below while you adjust the tail making it stand on it's edge and not lay flat. Take your time and it's not as difficult as you may think.
Step 4.
Now cut off the excess with a taper about mid way down the shank and bring your thread to the eye and then back down to the tail.
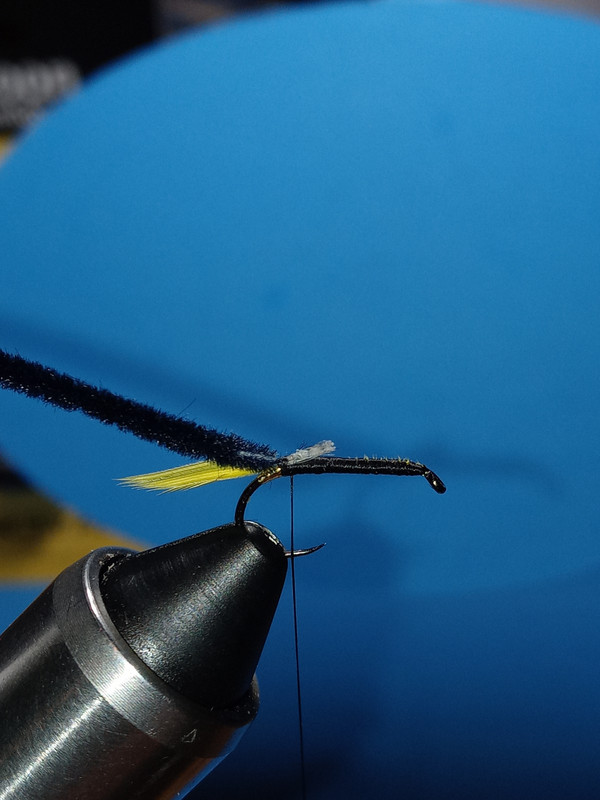
Step 5.
Now we tie in the chenille. Strip the chenille at the very end so you only tie in the core so you don't create a bump when you start wrapping. After you tie the core in, glue down the hook shank to keep the chenille from twisting later on.
Step 6.
Now wrap the chenille about three to four wraps and tie off. Now tie in the yellow hen hackle for the beard.
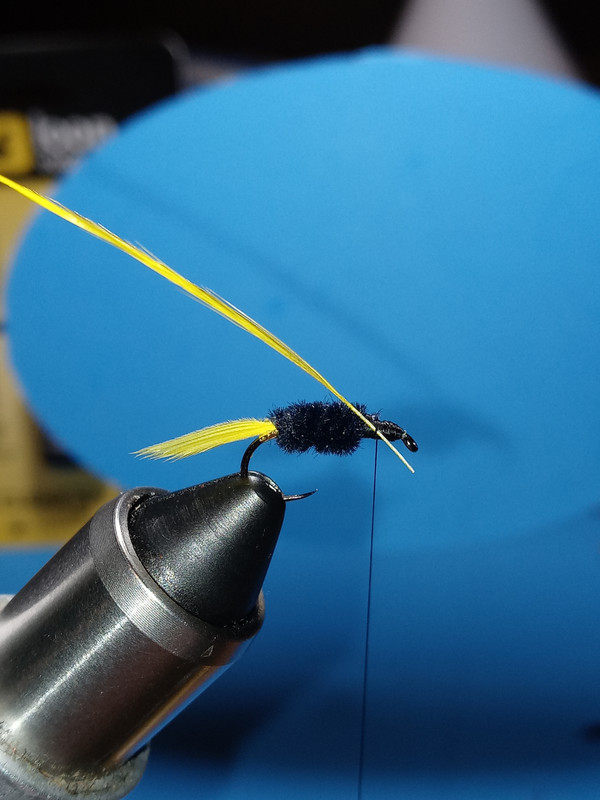
Step 7.
Wrap the hackle twice around and then tie it down. Reach under the hook with your fingers and pull the hackle down both sides of the hook to make the beard and then tie off. Trim out the fibers that you don't want. Then clean up the area with the thread.
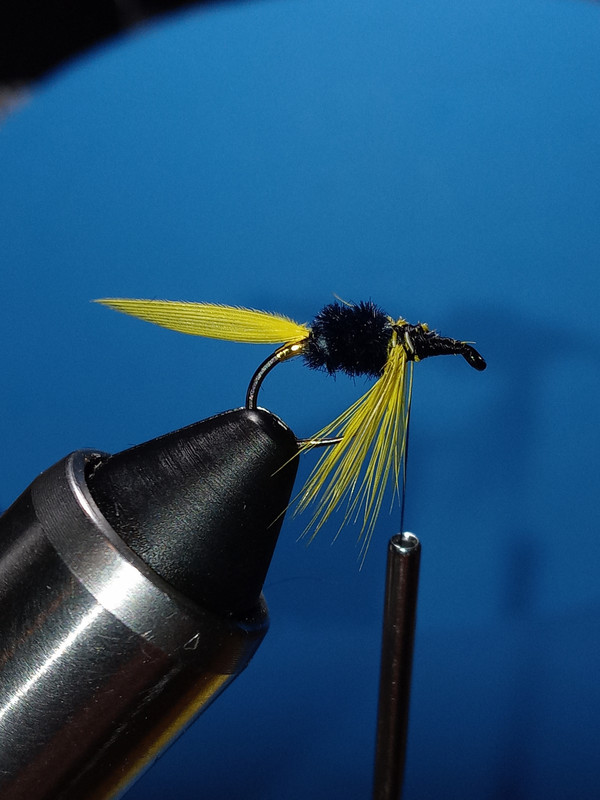
Step 8.
Now we tie in the wing. This is the tricky part and it takes practice. I have talked with experts and they all say they can't do it correctly every time, so that makes me feel better about my attempts. Take your matching white duck quills and take off the amount of the hook gap. Take the wings with you thread hand and place the wing where you need it to be. Now take the wings into your material hand and put a Vulcan Death Grip on the wings. Pinch wrap the thread and again allow the bobbin to hang and lift up the ends of the wings over the eye of the hook and make a little valley for the thread to lay in and then adjust the wings to sit on top of the shank. Wrap once more and tighten the thread down while sliding the index finger down to the end of the wings near the eye to help stop the wings from collapsing.
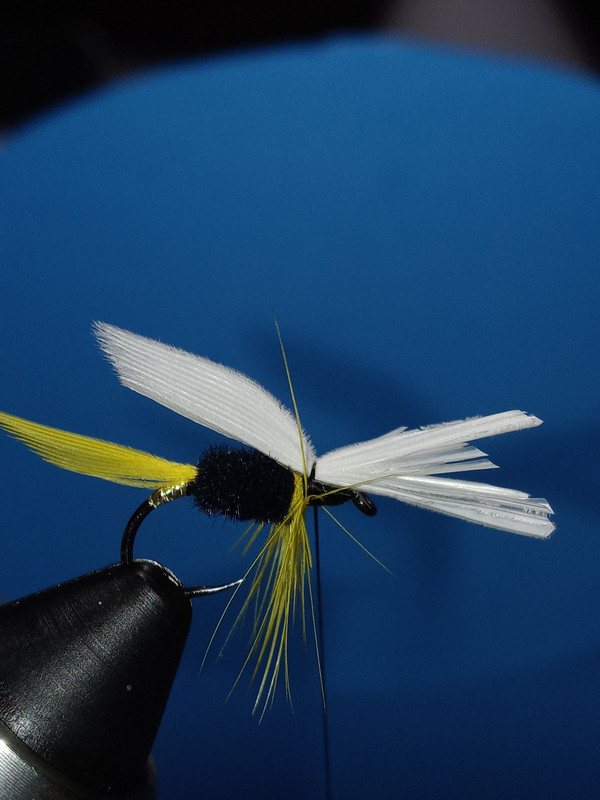
Step 9.
Now make the head of the fly and add some UV resin to complete the head.
This is a must have fly. I'm certain it will work in your local waters.
I will be tying both versions, but tonight I will share with you the wet fly version. Many say it's just another version of the Coachman, maybe so, but all I know is this fly has found a page in my fly wallet.
Lets get started.
Items needed.
Hook: Partridge SLD2 8 to 14
Thread: Black 6/0 Uni-Thread
Tag: Gold tinsel
Tail: Yellow duck quill
Body: Black Ultra Chenille
Beard: Yellow hen hackle
Wing: White duck or goose quill
Glue: Zap A Gap or any type of superglue
Beverage: Whatever you think you need at the moment.
Step 1.
Wax your thread and start behind the eye and wrap it down to the point of the hook.
Step 2.
Tie in your tag and wrap it down with the thread just past where the bend of the hook begins. The wrap the thread back up to the point of the hook and wrap the tinsel with touching turns up the bend and start wrapping the extra tinsel on up the shank near the eye and bring the thread back down to the bend of the hook.
Step 3.
Take a few fibers from the yellow duck quill, five or six will do, and tie in the tail. Make a soft pinch wrap and then allow the bobbin to just hang below while you adjust the tail making it stand on it's edge and not lay flat. Take your time and it's not as difficult as you may think.
Step 4.
Now cut off the excess with a taper about mid way down the shank and bring your thread to the eye and then back down to the tail.
Step 5.
Now we tie in the chenille. Strip the chenille at the very end so you only tie in the core so you don't create a bump when you start wrapping. After you tie the core in, glue down the hook shank to keep the chenille from twisting later on.
Step 6.
Now wrap the chenille about three to four wraps and tie off. Now tie in the yellow hen hackle for the beard.
Step 7.
Wrap the hackle twice around and then tie it down. Reach under the hook with your fingers and pull the hackle down both sides of the hook to make the beard and then tie off. Trim out the fibers that you don't want. Then clean up the area with the thread.
Step 8.
Now we tie in the wing. This is the tricky part and it takes practice. I have talked with experts and they all say they can't do it correctly every time, so that makes me feel better about my attempts. Take your matching white duck quills and take off the amount of the hook gap. Take the wings with you thread hand and place the wing where you need it to be. Now take the wings into your material hand and put a Vulcan Death Grip on the wings. Pinch wrap the thread and again allow the bobbin to hang and lift up the ends of the wings over the eye of the hook and make a little valley for the thread to lay in and then adjust the wings to sit on top of the shank. Wrap once more and tighten the thread down while sliding the index finger down to the end of the wings near the eye to help stop the wings from collapsing.
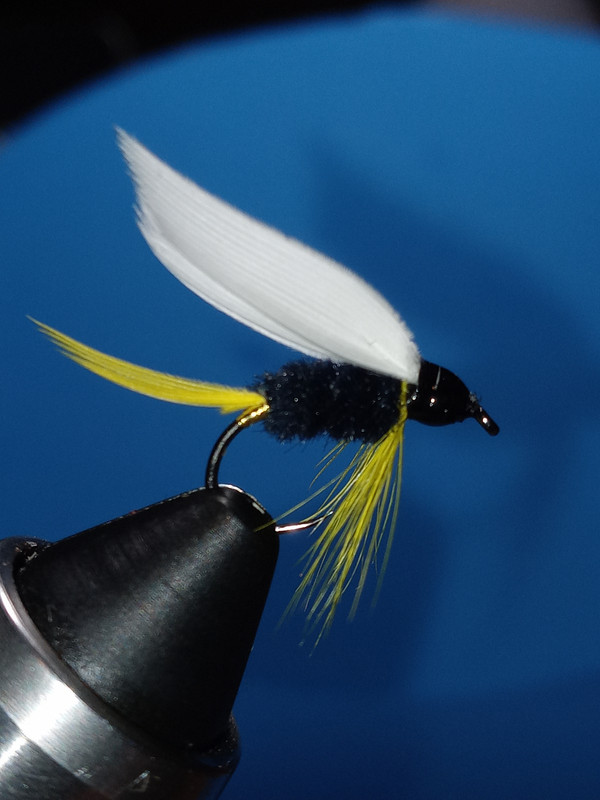
Step 9.
Now make the head of the fly and add some UV resin to complete the head.
This is a must have fly. I'm certain it will work in your local waters.
 . A great guide to follow,made easy.