New Reel making project..

A forum to show any of your restored or built traditional fishing reels.
Post Reply
User avatar
Watermole+
Chub
Posts: 1059
Joined: Thu Mar 15, 2012 11:07 pm
12
Location: Devon & Cornwall border

Re: New Reel making project..

Post by Watermole+ »

Part 7. ..Two steps forward..but one back.

Before we start, many thanks indeed for all your most kind and appreciative comments.
I would like to say however, that what I am doing is not beyond any one of you reading this, even if you have never touched a file or machine tool before. I don't possess any special skills or abilities, no more than the next man. I don't have any school qualifications, never did an apprenticeship and my manufacturing experience is actually quite limited; and apart from that gained from working in factories as a general dogsbody, is all self-taught.
What you don't see on this thread, are all the rejects and mistakes made-and they number more than a few! To make anything like this-or anything at all, come to that- requires nothing more than somewhere to work and the tools to work with..but most of all, you have to want to get a result; to succeed, even if it means scrapping something and starting again. That above all, is the key to success.
My motto is; "Argue for your limitations and they will be yours!" If you want to make something, then have a go! There is no shame in failure..
Last time, I started making the spokes; they just needed threading to complete..and this is where it all went pear-shaped!!
Cutting the 0.35mm pitch thread was not so good. I made 10 out of the 12, then broke the screw-cutting insert tip trying to cut the long thread on the spoke for the friction adjuster. I tried grinding one from HSS (High speed steel) but it wasn't up to the job and ended up scrapping the 2 spare spokes and 2 of the good ones.. I'm now going to have to start again and make a few more, but need to buy a replacement carbide M1.6 x 0.35p insert tip first.

...Anyway; onwards, ever onwards, as they say..
Last time, we were making the all-important hub. It was not quite finished, as the slots for the latch-and friction forks have yet to be put in. Also, I have been looking at pictures of Aerial hubs and have decided that my skills are not up to making the hub complete, as one piece. I'm going to make the little end cap, where the end-float adjusting screw goes, as a separate unit and solder the two together. This way I can get the spindle to perfectly match the hub, size-wise-and I have an idea for making a better end bearing..

Making the spindle.

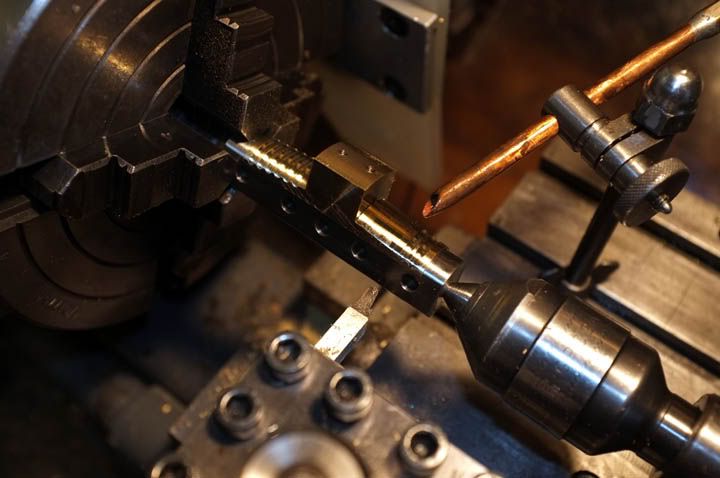
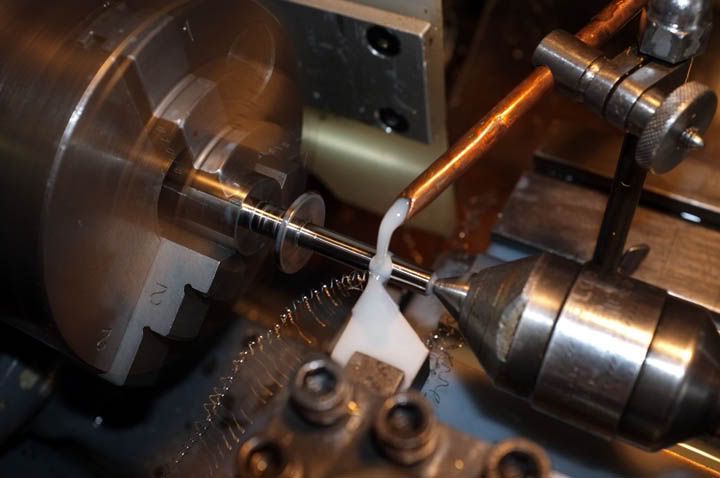
The material chosen was 17/4 ph stainless. This is an excellent metal for this task, free-cutting, non-corrosive and with good wear properties. I bought a small piece of 20mm diameter and started by roughing out all the excess material.
Here you see it being finish-turned to size..
Image

AS you see, I have already roughed out the end for locating into the star-back. I'm doing it like this so that all diameters are dead concentric.
After the O/D is turned to size, I turned the little groove for the latch fork and a 0.010"relief in the centre. The hub will bear on the ends only to make for better free-running . Clearance between hub and spindle is 0.0005". This picture shows the star-back location being turned to size.
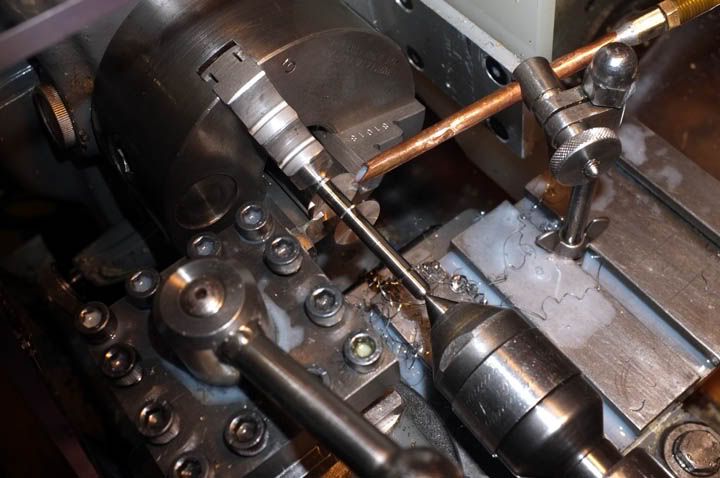
Image

Here you see the hub being checked for fit. I have pressed in a small ball bearing into the end of the spindle on which the end-float adjuster screw will run. This will have a point contact to minimize friction.
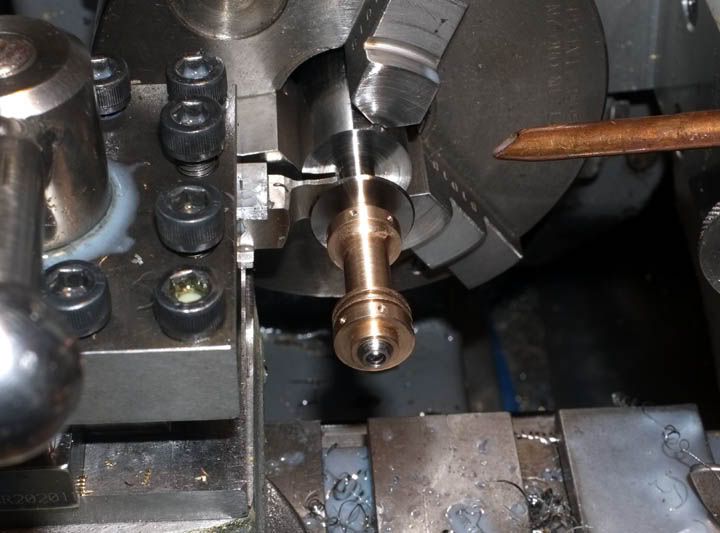
Image

These are the spindle and hub components. The screw is for rear location and the little black delrin spacer will be pressed into the wooden back.
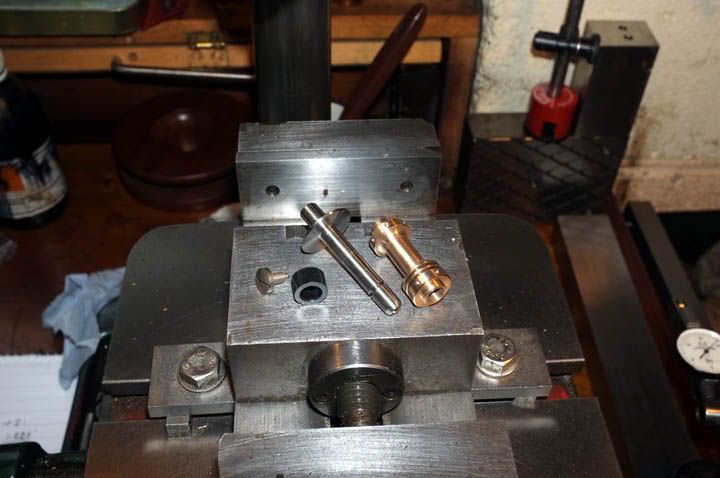
Image


Getting saddled up!

I thought we could make the reel saddle now, which would more-or-less complete the star back.
I started by drilling out a piece of bronze with a 5/8" drill, then boring it out to produce the reel seat-or saddle- radius. I then roughly turned most of the excess metal away to produce this shape.
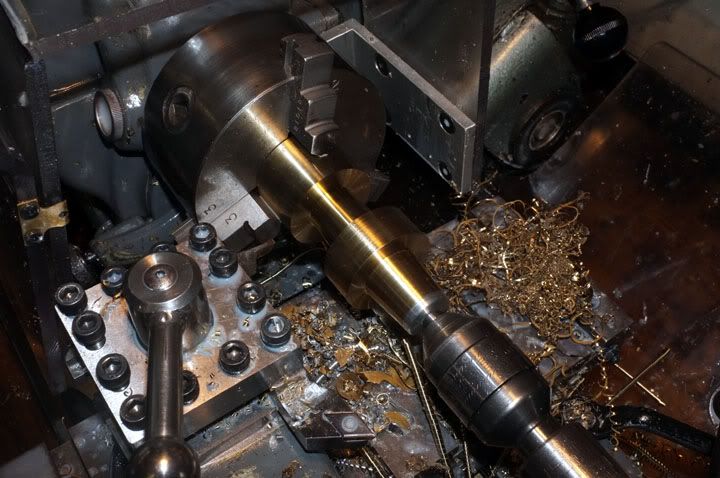
Image

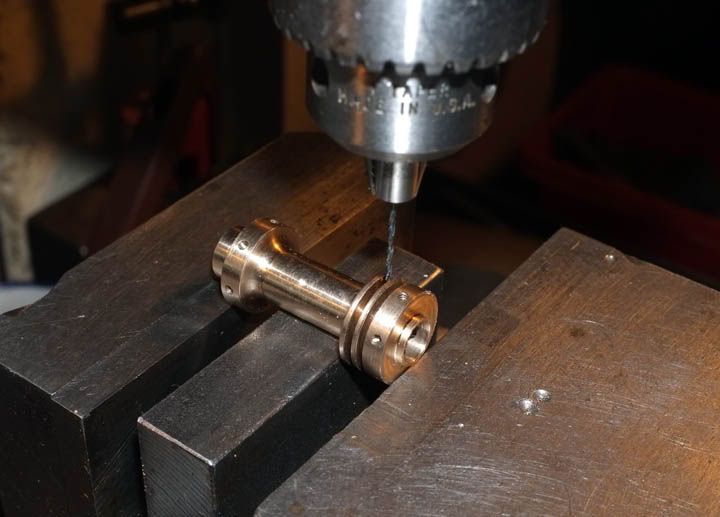
The drilling attachment was then set up and the M3 threads drilled and tapped in. I did this at 3 positions on the diameter as I can get 3 reel seats out of this.
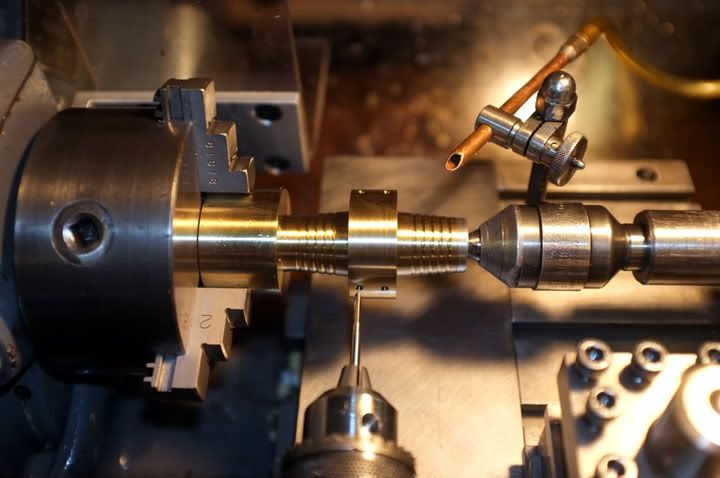
Image

It was then hacksawed into three more-or-less equal parts.
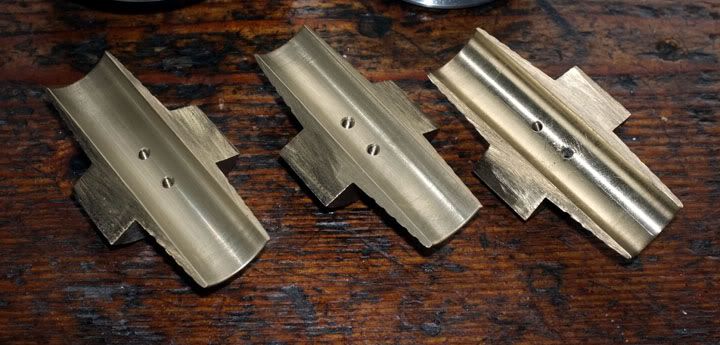
Image

I made a simple arbor to screw one of the pieces on to, attached this to a small faceplate and faced of each side in turn to thickness.
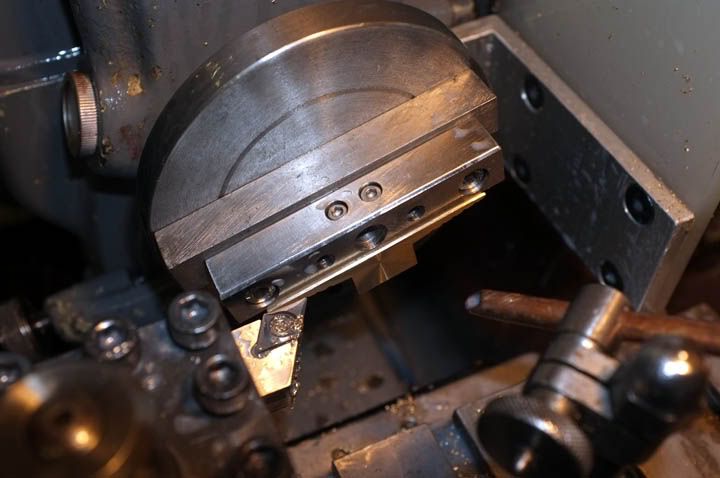
Image

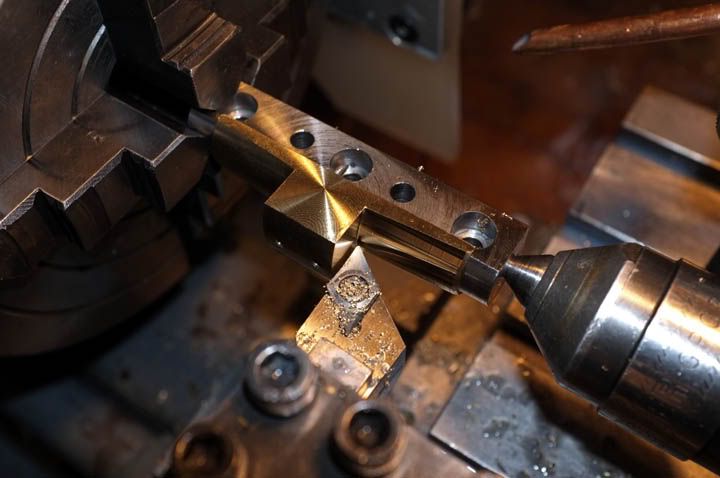
The arbor was then held in the 4-jaw chuck and the angles cut each end in turn.
Image

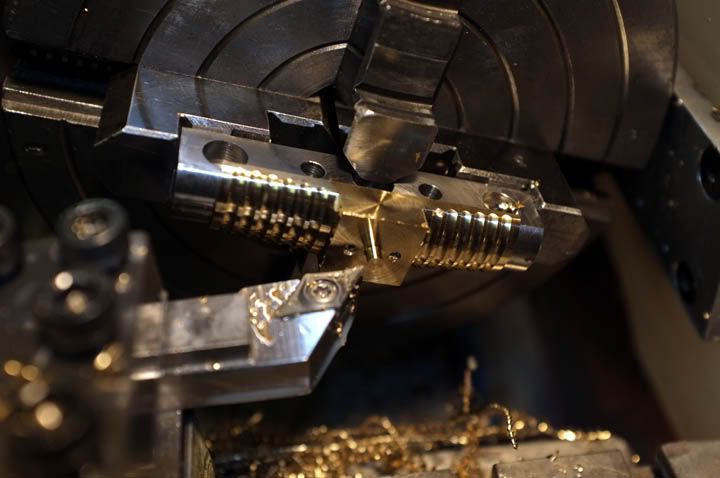
...and the grooves put in..

Image

The arbor, complete with seat, was then held square in the 4-jaw and the base of the seat turned to produce a 1/8" location spigot in the centre.
Image

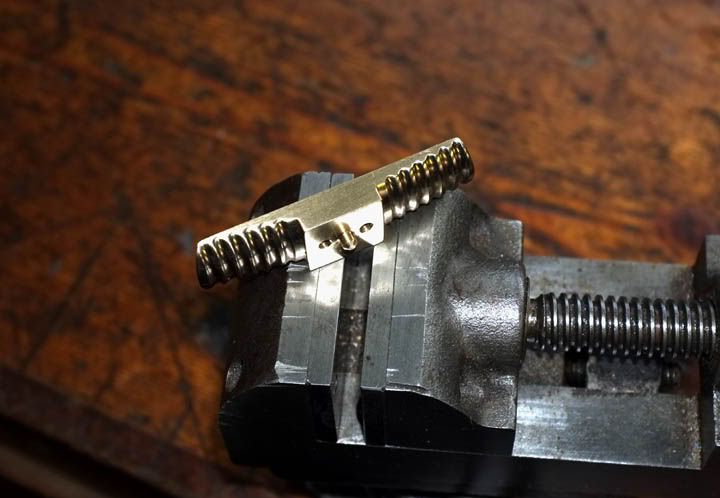
Now it was time to-literally-hand file and polish the seat to finish. Here we are, all done ready for fitting!
Image

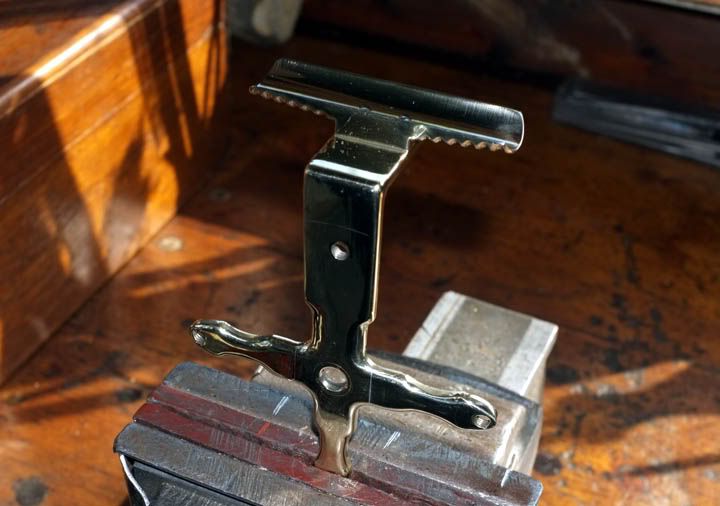
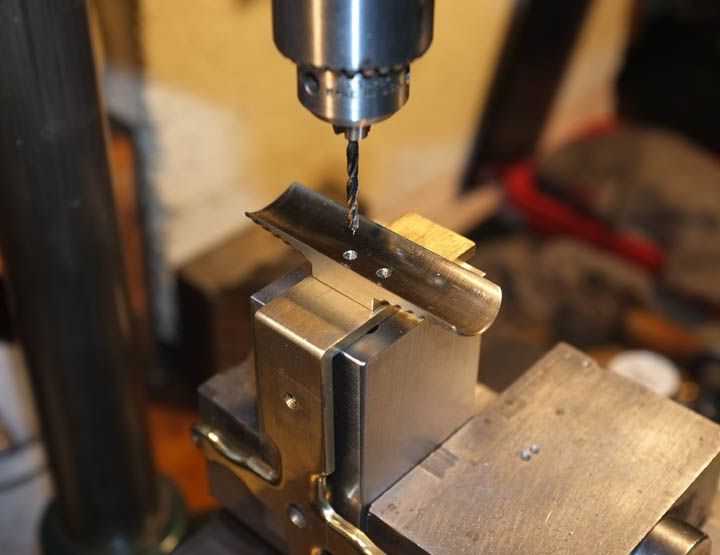
Turning attention to the star back, the seat was carefully positioned on the top and a 1/8" location hole drilled and reamed. the seat was located and then the holes were drilled for the fixing screws.
Image

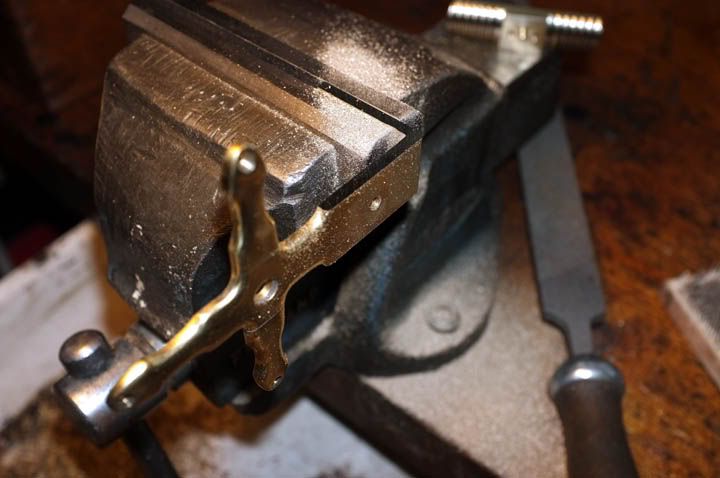
Now it was back to filing again. The surplus was cut from the top of the star back and the sides finished to blend in with the seat.
Image

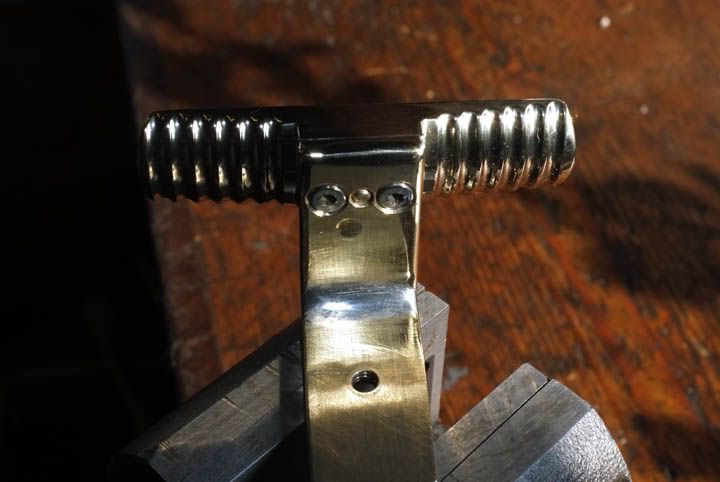
..and fitted together with countersunk M3 stainless screws from underneath.
Image

Nearly done..

Image

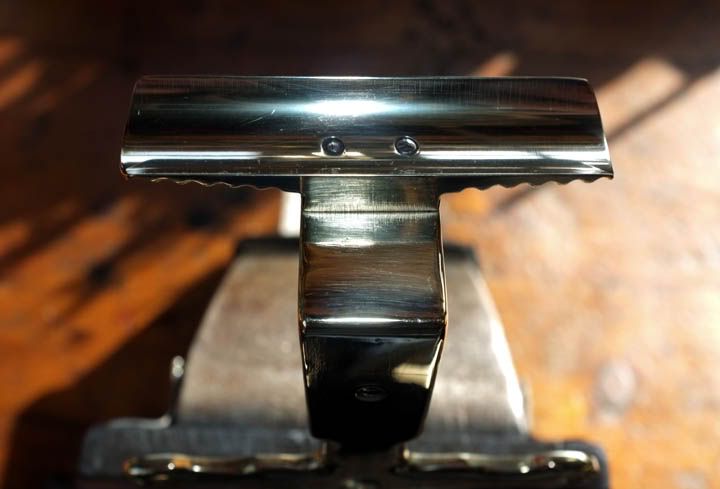
Polished to finish.

Image

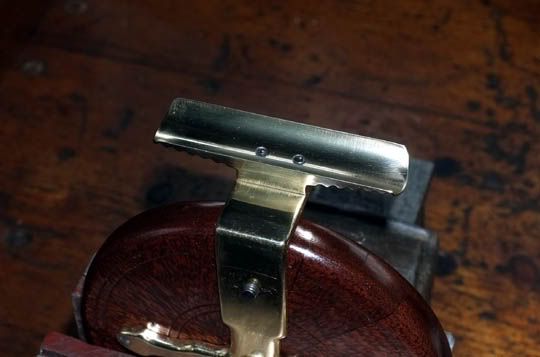
That's about as far as we can go for now with that. There will be one-or two holes to go in the back yet, to accept the optional check button-or lever, but here we are trying it for fit.
Image

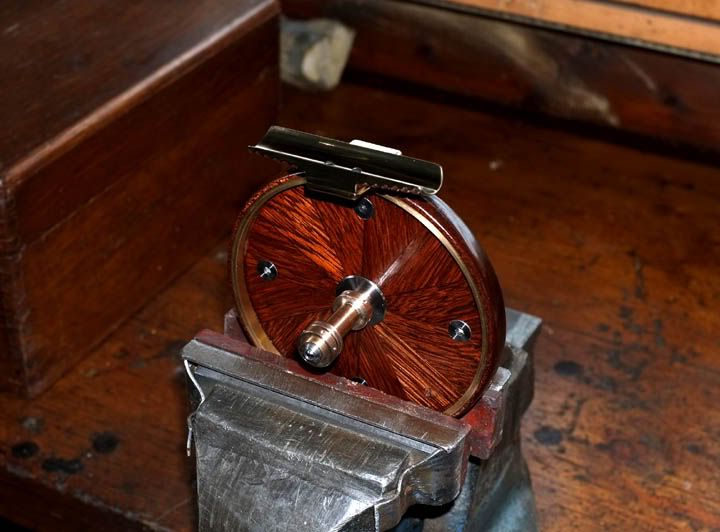
...and this is the story so far.. The hub is shown in position, but has not yet had the end cap fitted.
Image

More next time..hopefully, I will have the spokes made by then...

Regards,

wm+
Last edited by Watermole+ on Sun Jun 03, 2012 9:00 am, edited 1 time in total.

"Are not two sparrows sold for a farthing? Yet one of them shall not fall without your Father knoweth" ..Jesus of Nazareth, King James AV

User avatar
Mark
Head Bailiff
Posts: 21251
Joined: Mon Aug 22, 2011 4:55 pm
12
Location: Leicestershire
Contact:

Re: New Reel making project..

Post by Mark »

I don't care what you say wm+, even if I had all the equipment I could not produce a piece of work like this. You are a credit to yourself. :hat:
Mark (Administrator)

The most precious places in the English landscape are those secretive corners,
where you find only elder trees, nettles and dreams. (BB - Denys Watkins-Pitchford).

User avatar
Nobby
Wild Carp
Posts: 10991
Joined: Sun Oct 02, 2011 2:40 pm
12
Location: S.W.Surrey
Contact:

Re: New Reel making project..

Post by Nobby »

Brilliant. I love the reel foot.

User avatar
J.T
Catfish
Posts: 5910
Joined: Mon Sep 05, 2011 1:27 pm
12
Location: Surrey

Re: New Reel making project..

Post by J.T »

You are and artest and craftsman of the highest order WM+. :hat:
"piscator non solum piscatur"
Image

User avatar
Snape
Bailiff
Posts: 9984
Joined: Sun Sep 04, 2011 11:52 am
12
Location: North Oxfordshire
Contact:

Re: New Reel making project..

Post by Snape »

watermole+ wrote:but most of all, you have to want to get a result; to succeed, even if it means scrapping something and starting again. That above all, is the key to success.
My motto is; "Argue for for limitations and they will be yours!" If you want to make something, then have a go! There is no shame in failure..
I like this - a good motto for life in general. :thumb:
That said - You are too modest wm+. I cannot even begin to imagine being able to make such a thing!
“Fishing is much more than fish. It is the great occasion when we may return to the fine simplicity of our forefathers,” Herbert Hoover.
`·.¸¸.·´¯`·.¸¸.·´¯`·.¸ ><((((º>

User avatar
The Sweetcorn Kid
Wild Carp
Posts: 11792
Joined: Fri Aug 26, 2011 7:09 pm
12
Location: Portsmouth
Contact:

Re: New Reel making project..

Post by The Sweetcorn Kid »

Outstanding sir!!!
SK
The Compleat Tangler

“Imagination is the real magic that exists in this world. Look inwards to see outwards. And capture it in writing.”

Nigel 'Fennel' Hudson


Click here for my Youtube Channel...
https://www.youtube.com/channel/UCeoyLH ... 5H4u8sTDgA

Weyfarer

Re: New Reel making project..

Post by Weyfarer »

Exquisite.

User avatar
Watermole+
Chub
Posts: 1059
Joined: Thu Mar 15, 2012 11:07 pm
12
Location: Devon & Cornwall border

Re: New Reel making project..

Post by Watermole+ »

Part 8. Slow going....

..it certainly has been. I much regret that this week is very boring with no interesting pictures of an almost-finished reel for you-Sorry! We have now got to the stage where a lot has to be done before this happens, most of it dull-and very time-consuming; of which, I have not had a lot of to spare; but it has to be done and so let's press on...

I managed to get a replacement M1.6x0.35p cutting tip during the week and have at last finished the spokes-I hope. Making these has been the most challenging part so far, but only because of my inexperience with making such small threads. The awkward spoke was the one for the friction adjuster, which is threaded for much of its length and tended to flex away from the cutting tip. In the end, I made a primitive, but effective, tiny 'travelling steady' and finally got a result; not brilliant, but a result. I have nothing but admiration for the professional reel-makers who can make these so quickly. I seem to remember reading somewhere of a renowned reel-maker who can scratch-build every single part, to make up a complete reel in 40 man hours...I think my total must be about 400 so far!!!

..Anyway, spokes complete-and we move on.

There are a number of small, 'fiddly' parts to make before the reel drum can be united with its hub.-Indeed, the hub itself has not been completed yet;-and the ratchet check wheel has to be made and fitted after that!
We have got to the stage where the hub is a nice fit on the spindle, but needs two little slots cut into the bore from the bottom of the two grooves. These are for the spring latch at the rear and in the front, for the friction adjuster. I did this by setting up the hub carefully and accurately in the vice and then chain-drilling a series of 0.9mm holes into the bore..

Image

Then it was a matter of carefully filing them together with a very tiny needle file, to produce the slot. The position had to spot-on, otherwise the fork would not do its job. I did one, then re-positioned the hub and did the second slot for the latch, in the rear groove.

Now it was time to make the forks.
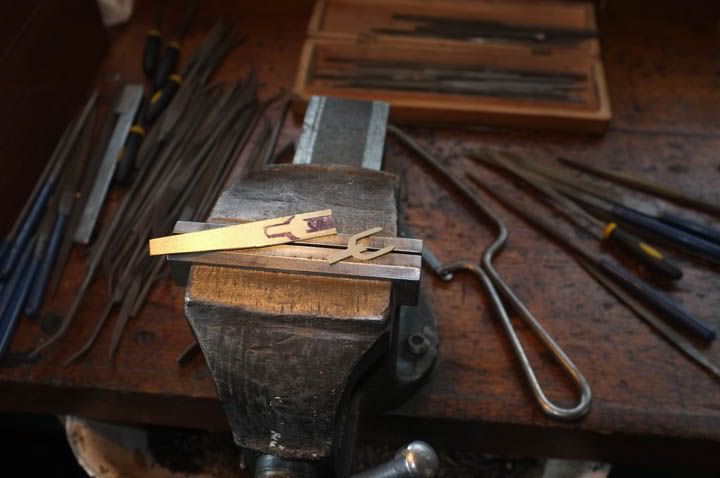
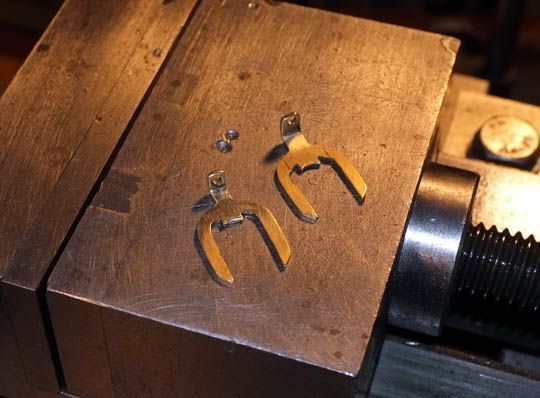
I made these from a piece of very high-quality, rolled, sheet aluminium bronze of perfect thickness. Here, one has been made, ready for finish-filing and polishing and i am cutting out the second.

Image

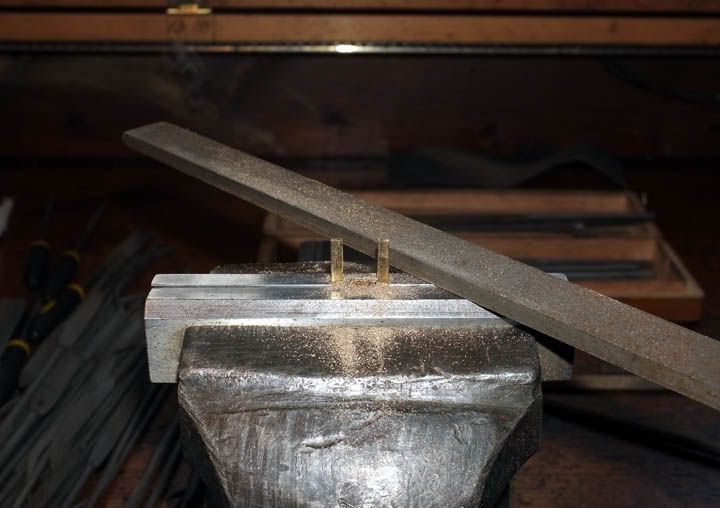
The gap between the forks is very important, so I firstly rough-filed it out..

Image

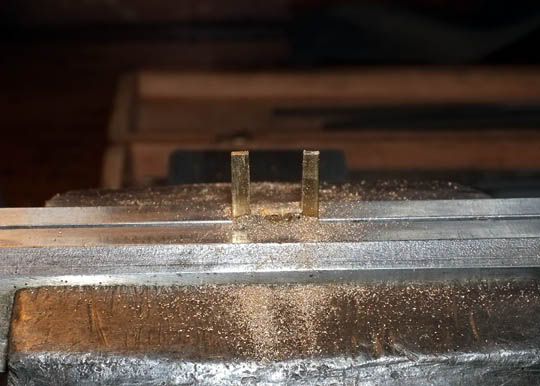
..then filed to within 0.010"..

Image

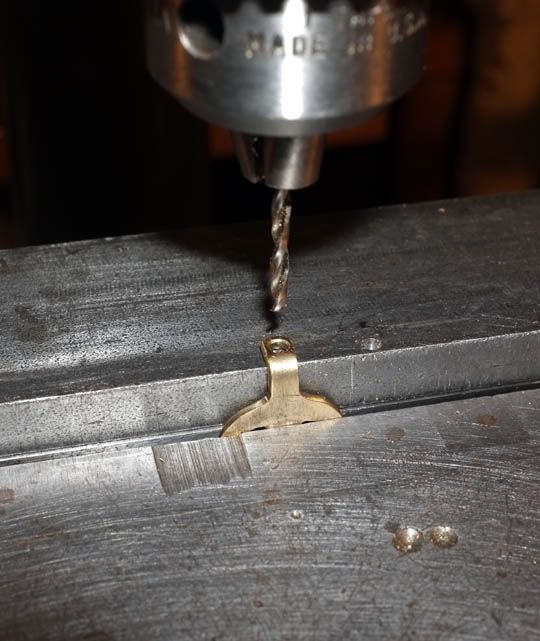
It was a matter of patient work with flat-and half round needle files to produce the shape, constantly trying it for fit in the hub. When both were made, the ends were bent to 90 degrees and the 1.6mm spoke holes drilled.

Image

Here are both forks, ready for finishing.

Image

I still have to make the little springs for them from very fine spring wire.


Making the Ratchet Check Wheel

This has to fitted before the hub is joined to the drum. I am going to make this size-for-size with the hub end and fit together with 'Loctite'. This will never come off once thus fitted and so there is no need to bother with pinning it to the hub. It could be removed if necessary, by heating, which would destroy the Loctite, but would never otherwise fall off.

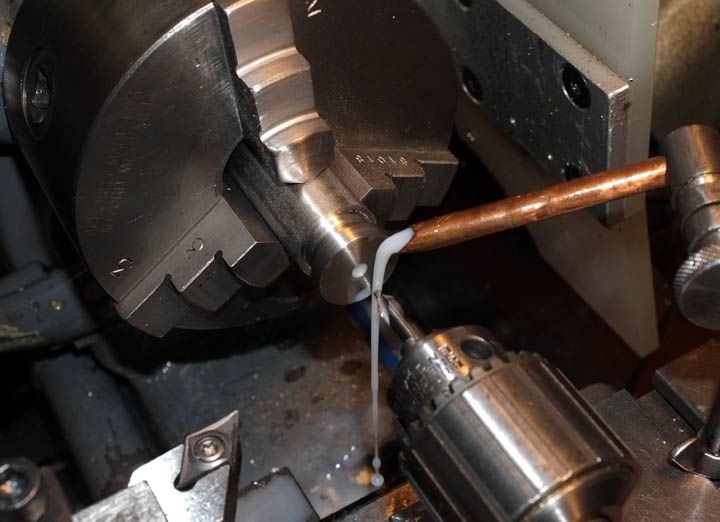
I started by rough-turning a piece of hardenable steel and drilling an undersize hole.

Image

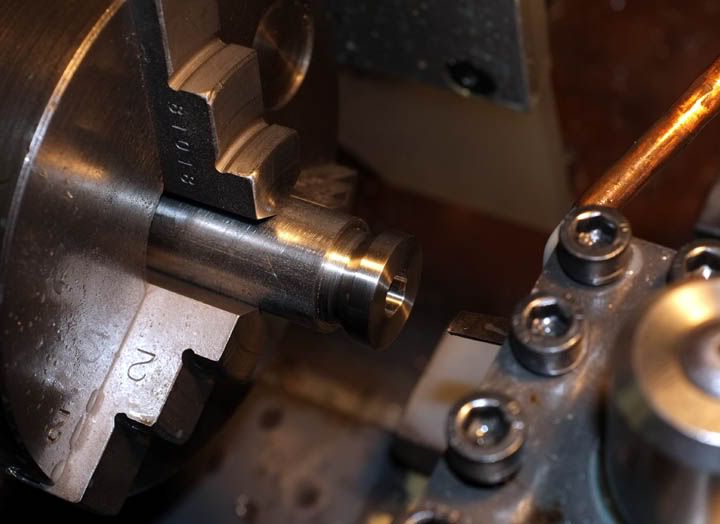
This was then bored out true to size and finish-turned.

Image

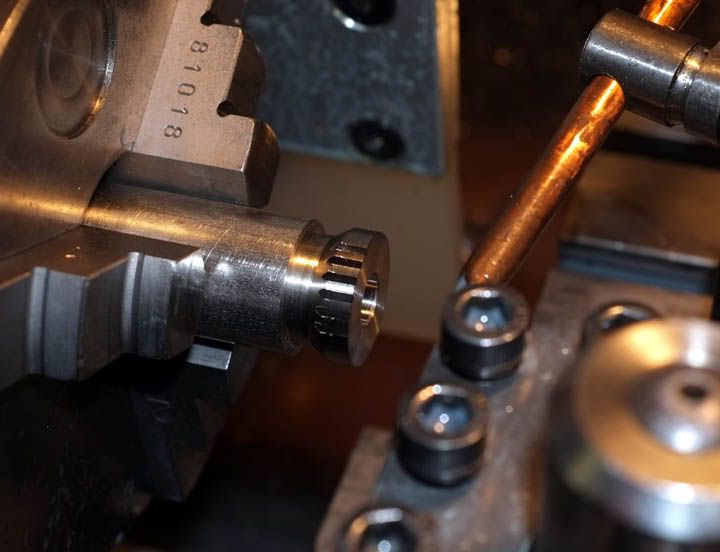
I am now just starting to broach out the teeth..This is a long process because it should really be done on a mill with a proper tooth cutter. We have neither cutter nor mill so it is the hard way..but we will get there..

Image

...eventually.

When this is done, I have to design and make the on/off check itself.

..More boring work I/m afraid-but the end is in sight.. :thumb:

Regards,

wm+

"Are not two sparrows sold for a farthing? Yet one of them shall not fall without your Father knoweth" ..Jesus of Nazareth, King James AV

User avatar
Beresford
Sea Trout
Posts: 4261
Joined: Sat Dec 17, 2011 1:26 pm
12

Re: New Reel making project..

Post by Beresford »

:o

At every turn it gets even more impressive.
The Split Cane Splinter Group

User avatar
Loop Erimder
Wild Carp
Posts: 9984
Joined: Wed Apr 04, 2012 11:33 pm
12
Location: Leicestershire

Re: New Reel making project..

Post by Loop Erimder »

It is by no means boring at all wm+, even if I had the skill to do what you are doing I certainly wouldnt have the patience. I look at pins on ebay or books or anywhere and just take it for granted that I can have one but yours is something else!!
Chance is always powerful. Let your hook be always cast; in the pool where you least expect it, there will be a fish

Post Reply

Return to “Traditional Reel Building and Restoring”