I would like to say from the outset that, this will be my first go at this so bear with me when things don't go exactly to plan.
This is inspired by the top-notch efforts of such Worthies as GUDGEON JIM and HERMIT-and many others of equal merit, for whom I have nothing but admiration for their persistence and efforts. It is not intended to be a top-of-the-range net, as made by Messrs. Cook or Barder et al., or intended to compete with anyone, it will just be a practical landing net for personal use in a local pond, where the biggest fish -carp- don't usually get into double figures.
So..before I start, I would like to thank everyone for their posted ideas in net-making and for solving many of the problems in advance!
Also to SNAPE, whom I have been in touch with and has kindly furnished me with many of the dimensions and data, which otherwise would have only been guessed.
Having said that, I have scaled down some of the sizes and increased others, to suit personal requirements..
The first thing was to decide exactly the most suitable size and as a working figure, decided that the inside dimensions of the tear-drop frame would be something around 19" diameter and about 24" from the top of the handle to the opposite point. This would comfortably accommodate anything I am liable to contact!
The next thing was to decide on the build method. Have to say I really like the laminated way of construction because, although it will be very time-consuming and not as straightforward as a single piece of wood, I feel that if it is done right, there will be greater inherent strength and there should not be any local weak spots. To be honest, I was sold on this after reading Hermit's post, so was virtually decided from the start!
I also would like to incorporate a hinged frame on a 2-piece handle, for ease of transport, but realize that this may not be possible..but am still working on it.
The weather has been so bad lately that it has not been easy to work outside, dodging the downpours, but a start has been made and here is the progress so far. Apologies for some iffy pictures.
The first step was to draw out the proposed frame Former on an old piece of scrap chipboard. This is only a working size and will be modified later.
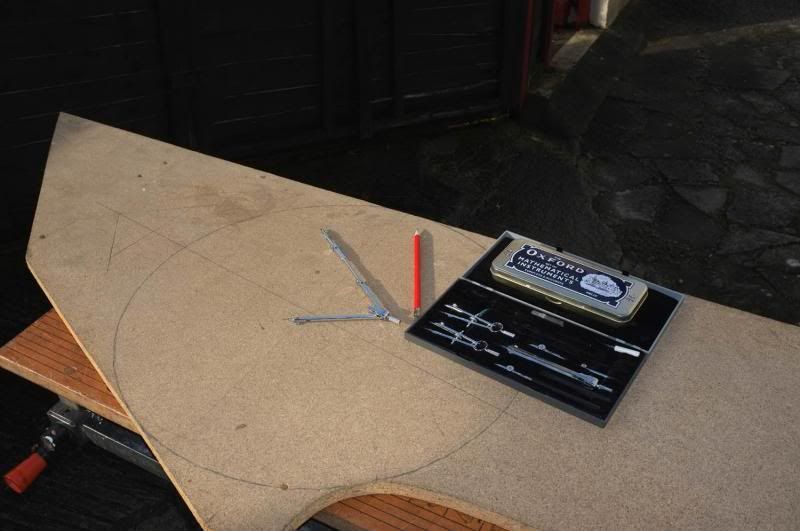
This was then cut out during a rare break in the rain and as you see, the shape is a bit odd. It doesn't matter at this stage and I will reshape the handle end later.
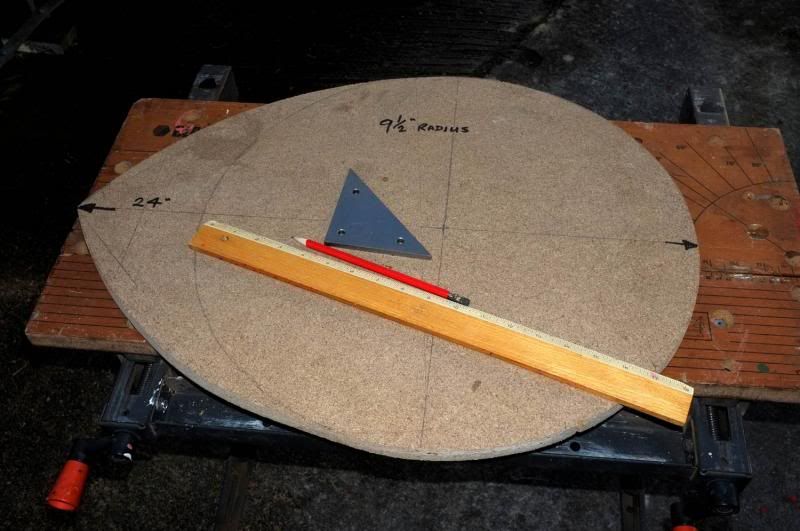
A quick update on this:- I did some sketches this morning and found that by reducing the length to 23", i.e. reducing the distance from handle to centre to 13 1/2" instead of 14 1/2" and blending in the radii more, it is much more proportionally pleasing to the eye so will probably settle on that.
Next, look for some wood to make the frame with. I went along to a joinery Firm and was given some thrown out pieces from their skip. One of these was a piece of what looks like either walnut or chestnut, will stand corrected on this. It is very brown in colour and exceptionally straight grained throughout the entire length of 78". It was just over 4" wide without any splits so I asked why it had been dumped. It seems that it was incorrectly planed so no good. The thickness varied from just over 2.5mm to 5mm! (Sorry about the mix of Imperial and metric dimensions). Anyway it was free!
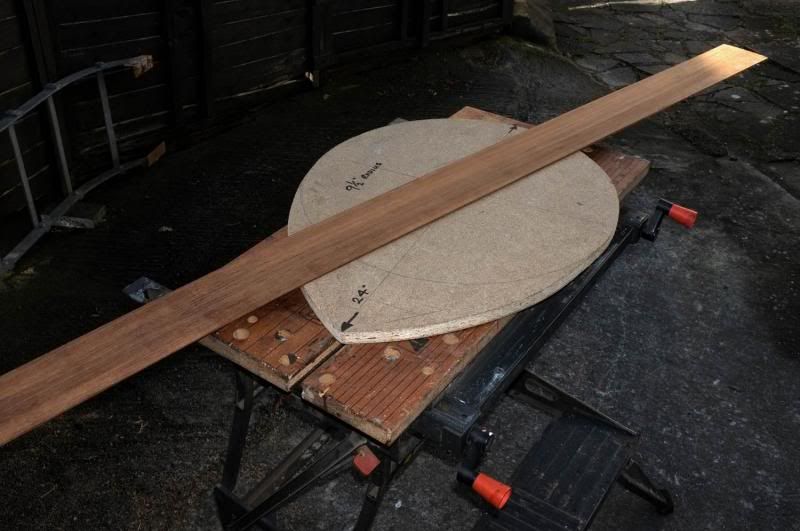
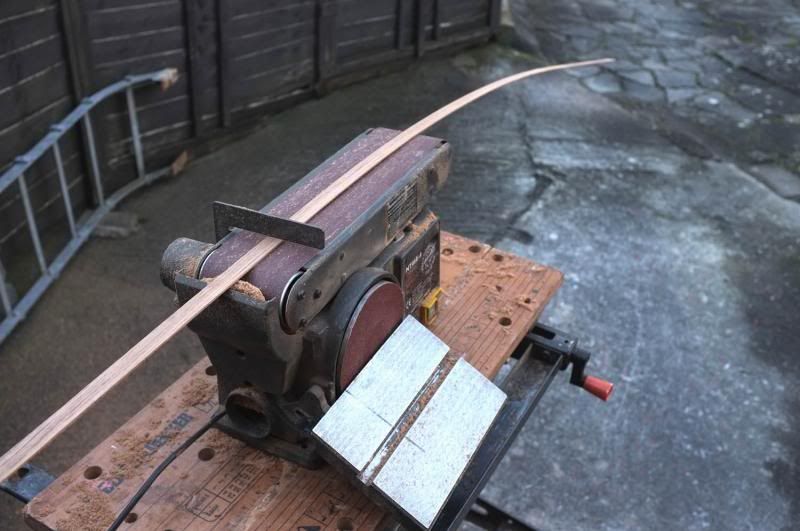
This net will be about 3/4" by 3/8" in section so the next difficulty will be to saw this up accurately into strips.
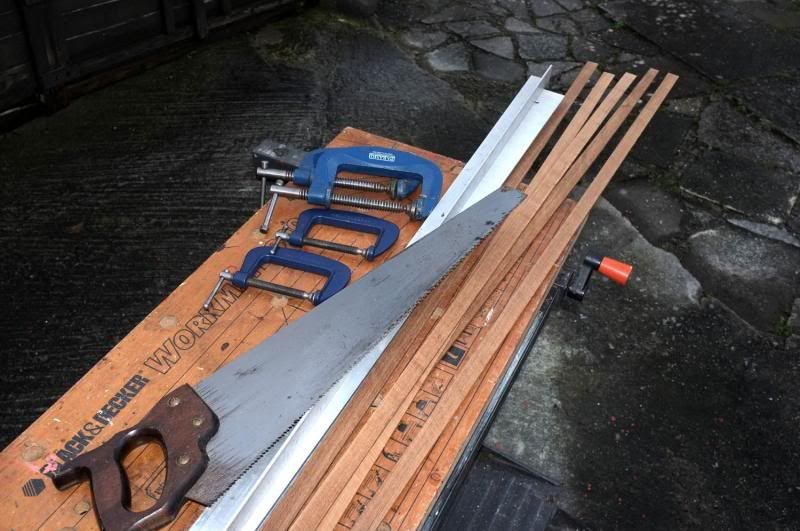
This turned out to be easier than it looked. Firstly, the strips were marked out, allowing for saw blade thickness plus error. Next, I found that by clamping my piece of extruded aluminium section-which I use as a long, straight edge-in the 'Workmate' and clamping my piece of angle section to it as a cutting guide, it was possible to achieve quite a good result, even with a big saw. In fact the big saw, cutting almost flat, was better because it doesn't tend to 'wander'. I practised first on some scrap pieces then did it for 'real'. Yes, it was a bit of a pain, having to keep re-positioning up everything-and dodge the rain-but in the end, I finished with five fairly equal width strips..without breaking any!
The next thing was to get these strips to even thickness, if possible, about a constant 2mm. I know it looks dangerous-which it is-but this was achieved by setting the gate on the belt sander so that it just touched the thickest part of the strips and passed them through it, one at a time, taking off the tiniest fraction only. When they were all done, the gate was lowered a tiny bit more and the strips again passed through, the process repeated twenty or more times until all five strips are now between 1.8mm and 2.1mm thick. It took a considerable time and dust was everywhere but we now have them all ready for steaming.
Now, we have to finish making the former and clamps. I want to be able to take the strips straight from the steamer and get them on the former whilst they are still hot and without panic or problems, so am currently working on this.
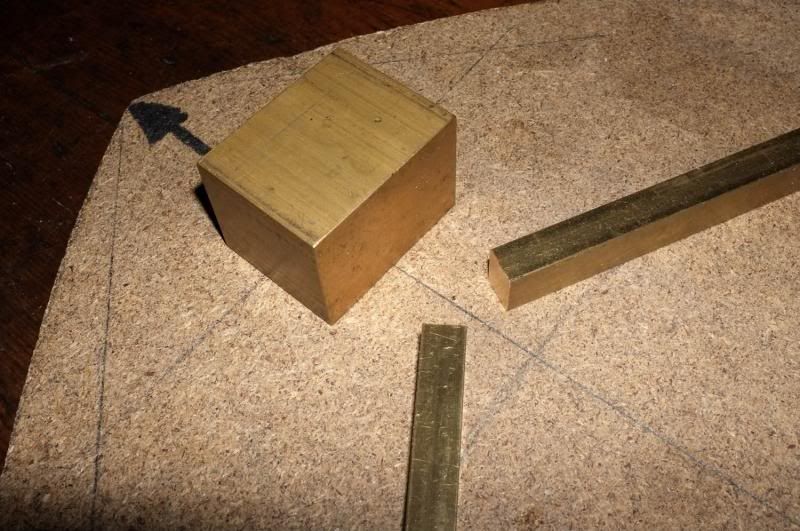
..But have found some bits of brass left over from the float lathe project and they will be the basis of the centre yoke...
More next time..when the rain lets up for a while..
Regards,
wm+